No longer house your prospects on a separate system or spreadsheet. Capture and nurture pre-enquiry prospects directly on OpenApply by sending automated scheduled emails, tracking sources, and leaving notes. Contacts can seamlessly transition to become enquiries or applicants.
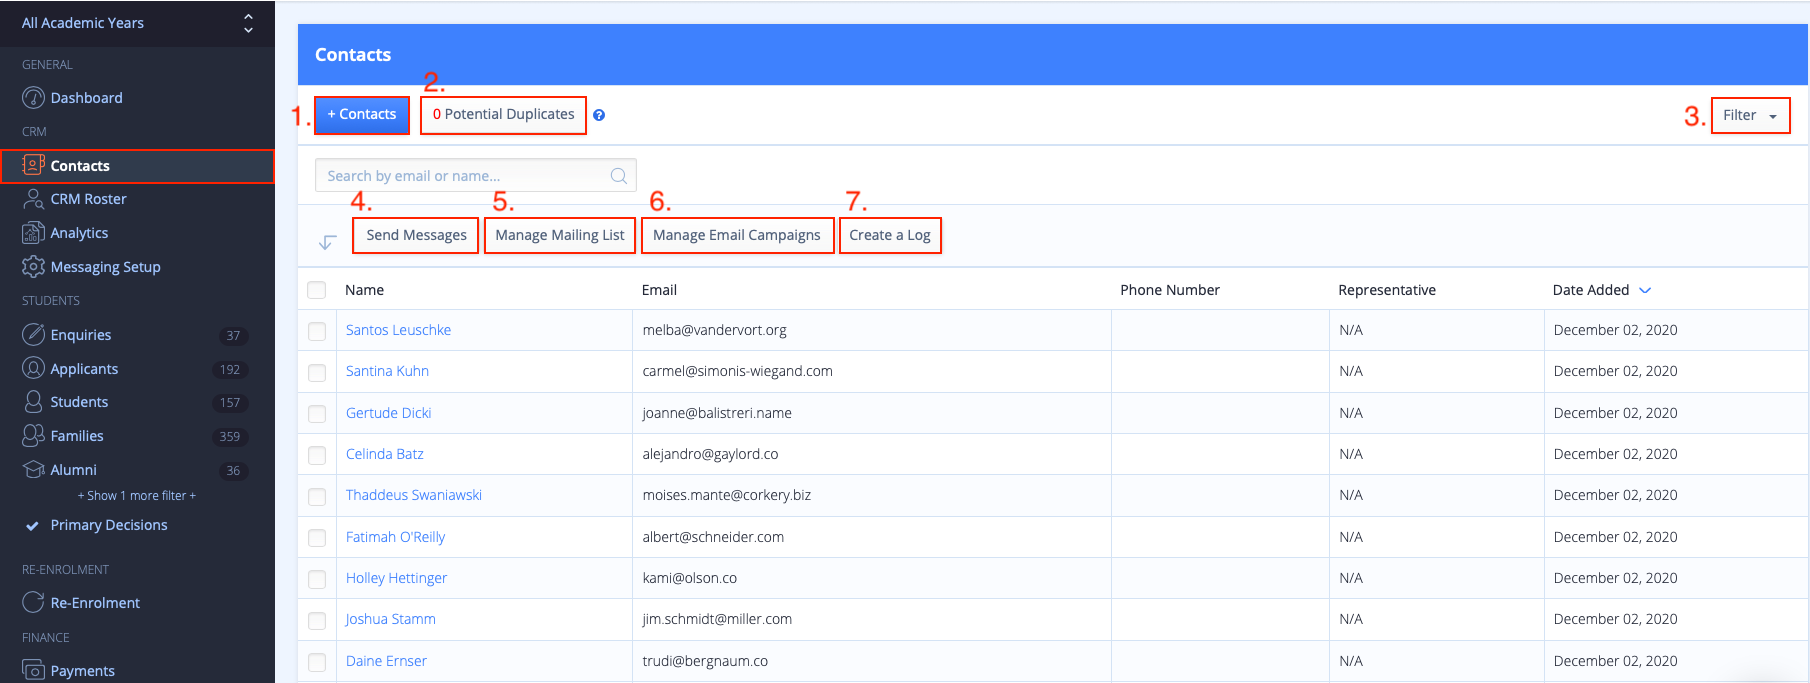
Click the Contacts roster on the left panel, to access the following functions
- Click + Contacts to add new contacts. Choose to manually add a Single contact or import Multiple Contacts. When adding contacts, First Name, Last Name and Email are mandatory
- Potential Duplicates shows any contacts that have the same email address
- Click to Filter contacts, according to Log Indicator, Source Campaign, Mailing list, Representative or Email Campaign
- Select contacts and use Send Messages to manually send a new message or template to those contacts. Messages can be created with the Simple Editor or Advanced Editor
- Select contacts, click Manage Mailing List and then choose a mailing list, to manually subscribe or unsubscribe those contacts to that mailing list
- Select contacts, click Manage Email Campaigns and then choose an Email campaign, to manually subscribe or unsubscribe those contacts to that email campaign
- Select contacts and use Create a Log to log an activity for that contact, such as a call or meeting. You can then record the date, outcome, staff member, and add notes to that log
Contact Profile
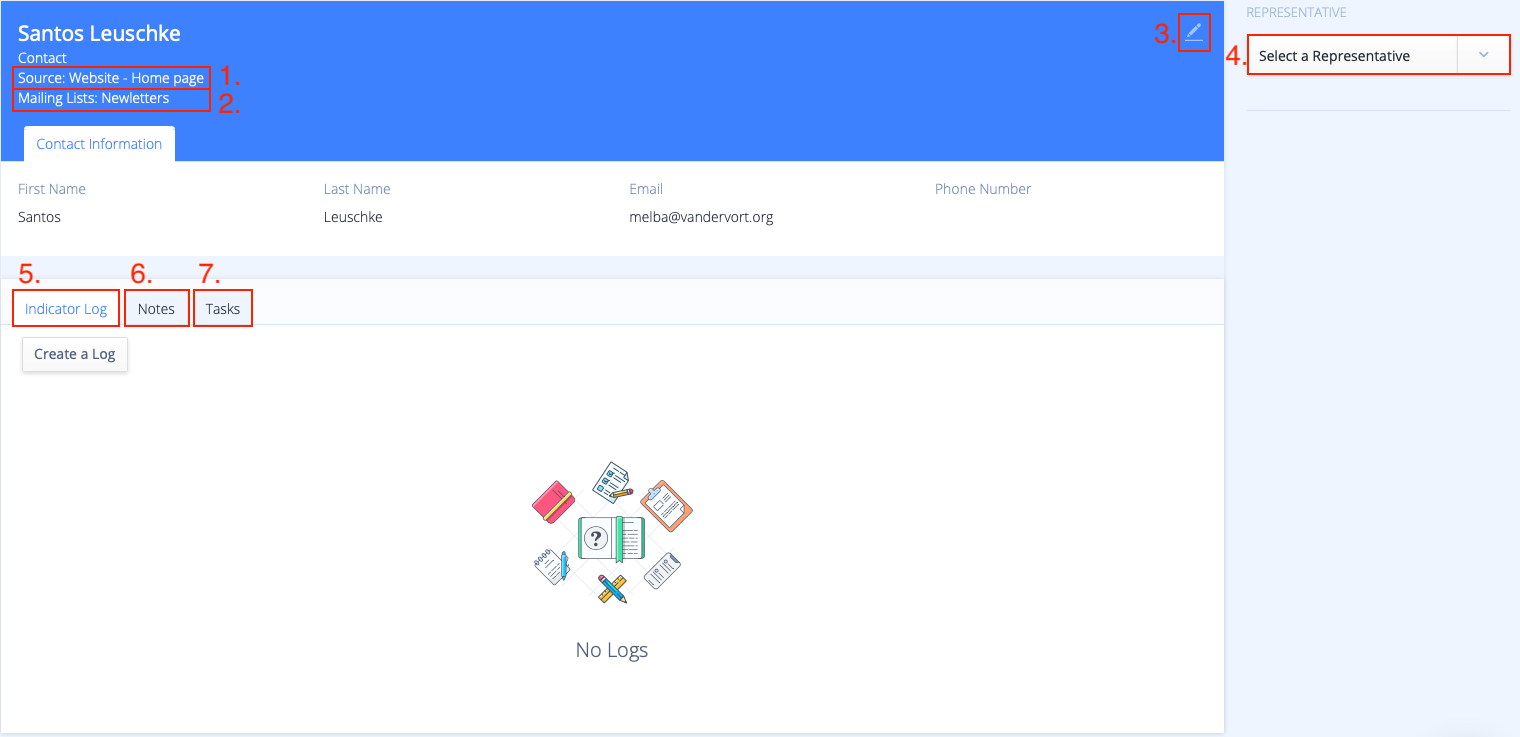
Click on a contact name to view the Contact Profile, where the following information and functions are available
- Source indicates the source of the contact
- You can view any Mailing Lists that the contact is subscribed to
- Click the pencil icon to Edit the contact
- Select a Representative for the contact, from the list of users in the Staff Directory
- View the Indicator Log, to see any activities that have been logged or to create a new log
- Click to add Notes to the contact. Notes are internal by default, and you can also choose to send a note to the contact
- Click to add Tasks relating to the contact
You can also scroll to the bottom of the page, to view the Latest Activity for that contact.
CRM Contacts
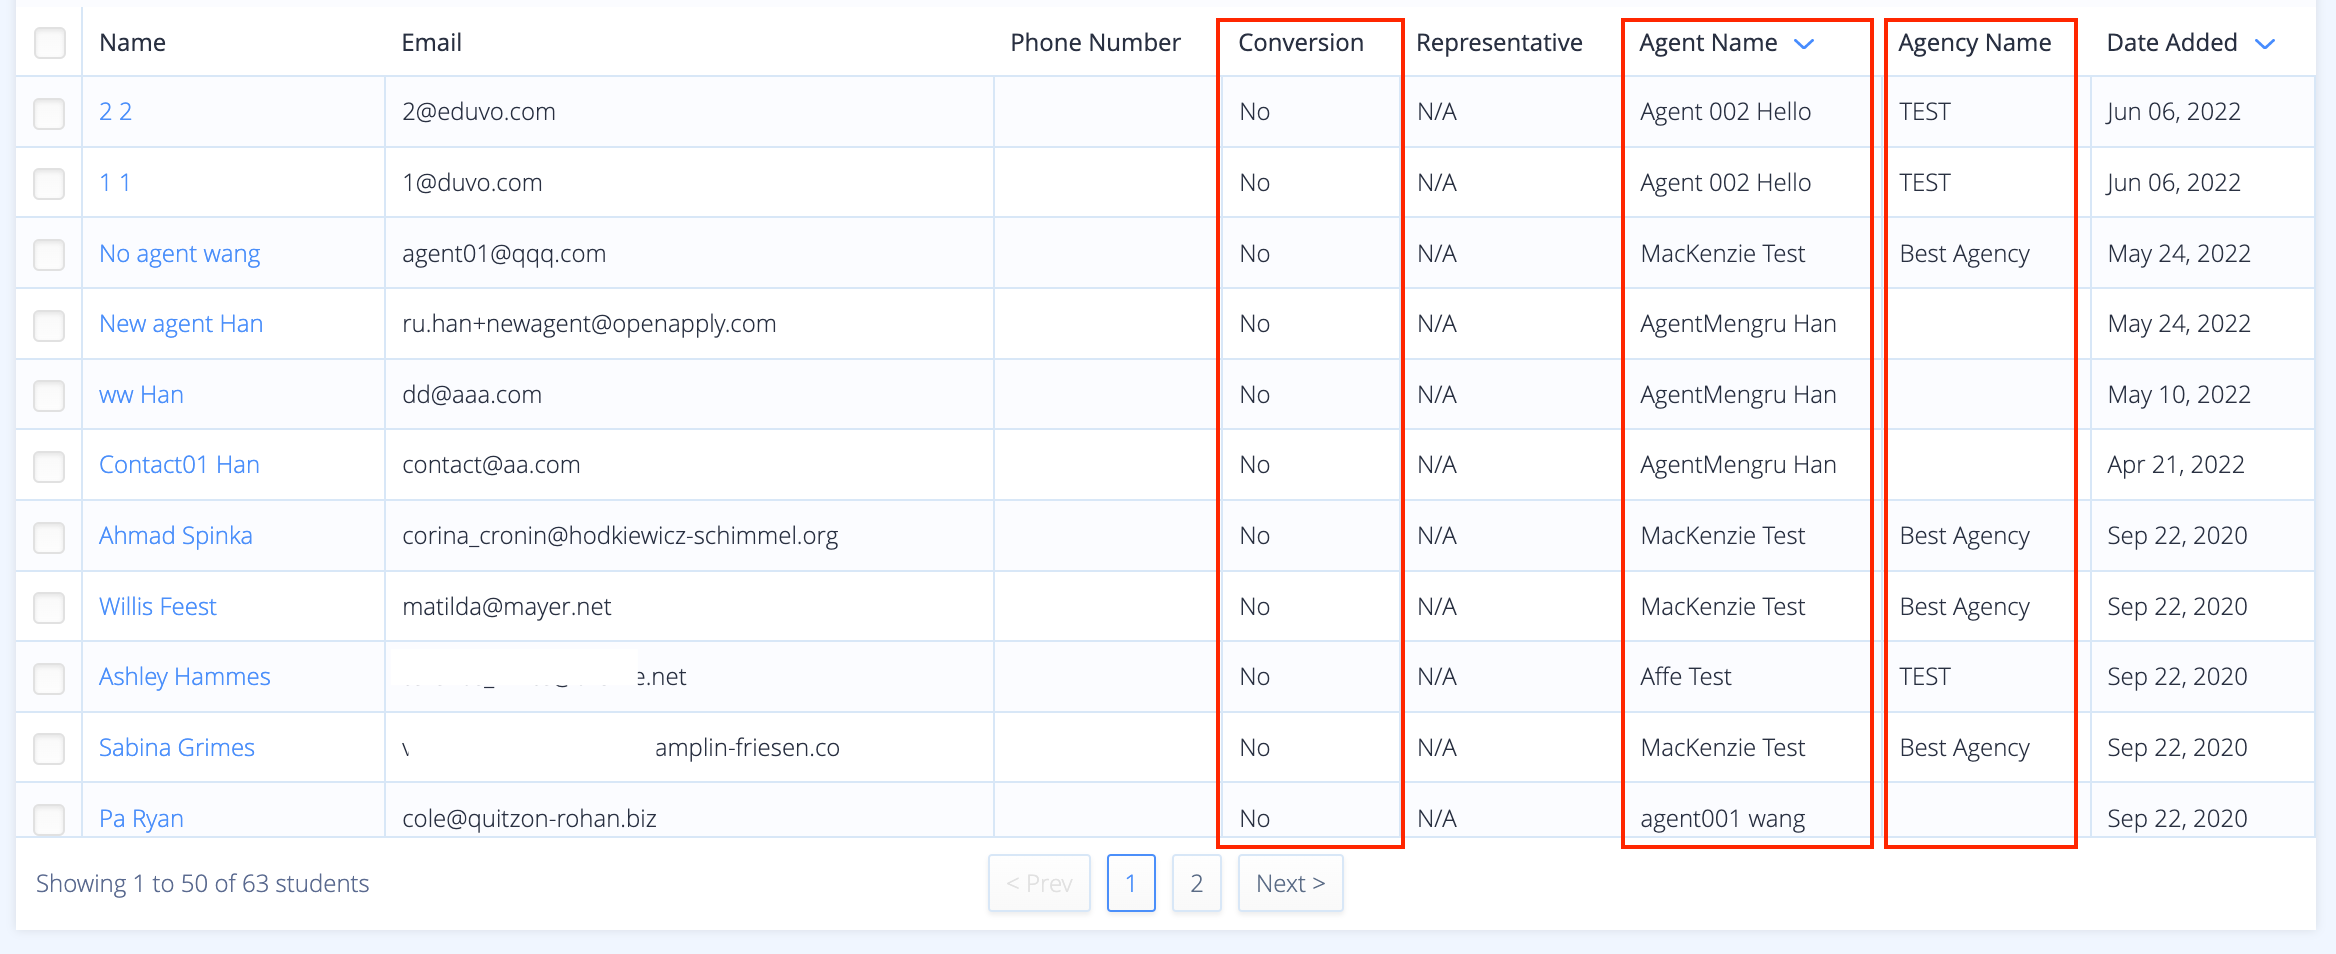
If you have the CRM feature enabled, the contacts roster will also show the Agent Name (which Agents are assigned to the contact), Agency Name, and the Conversion (Whether the contact has been successfully converted into a parent).
Assigning an Agent to a CRM Contact
You can assign an agent to a contact on your agent roster.
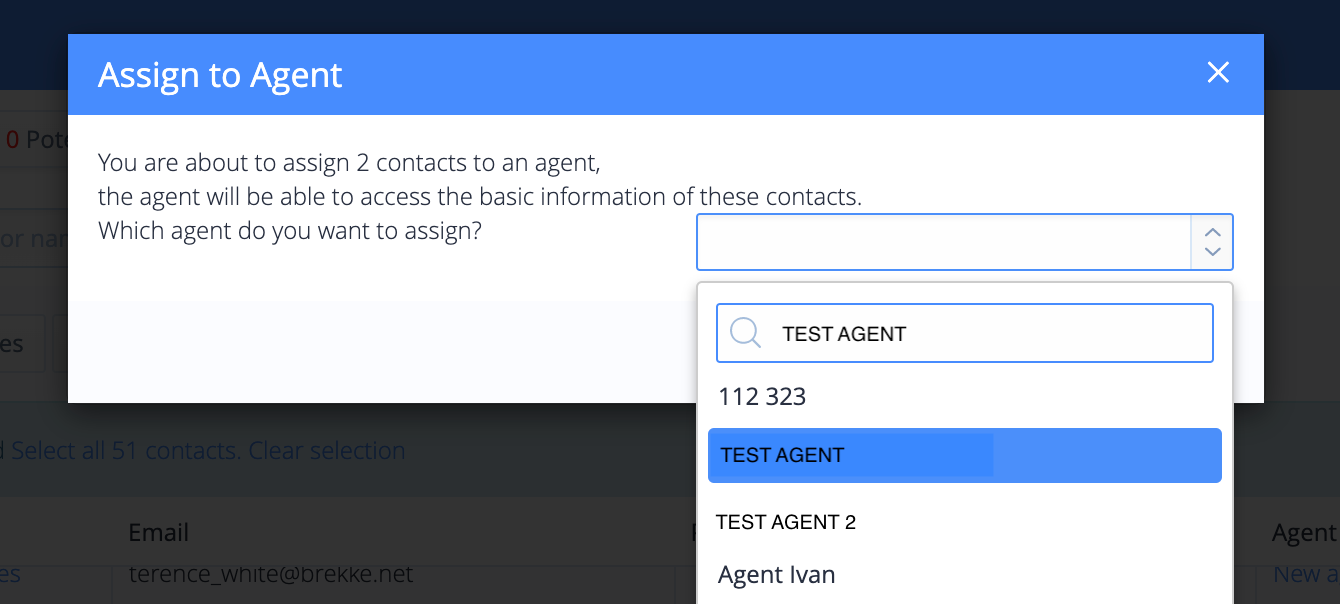
To do this, navigate to your contacts roster > Select the “Assign to Agent” button

There is 2 options to select from:
1. Assign directly to designated agent:
This will allow you to select the agent you would like to assign to a contact to.
Or 2. Assign randomly the students in large batches.
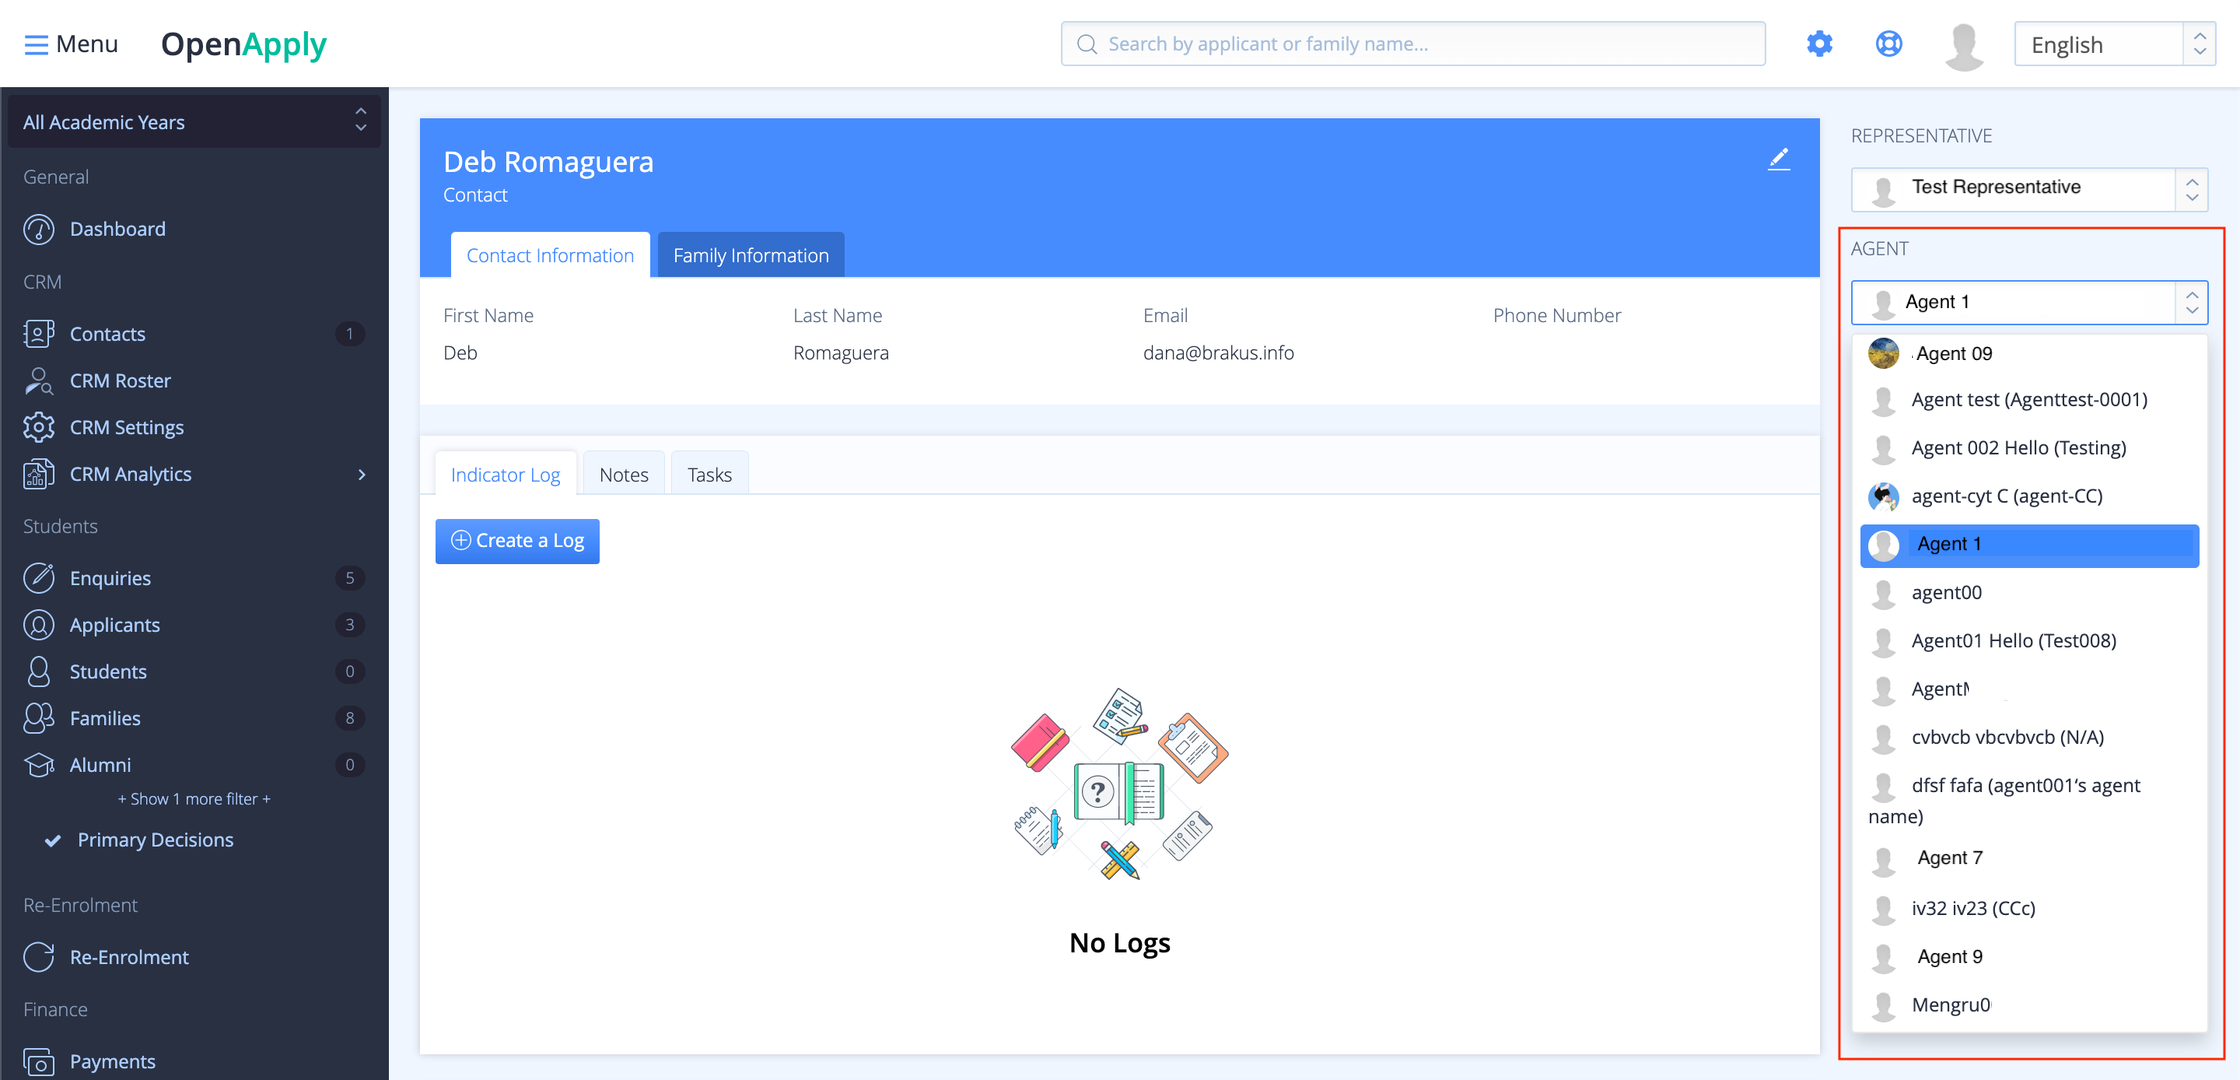
You can assign an agent to a contact directly through the contact account.
Select the contact account you would like assign an agent to > Select the agent drop down menu from the panel on the right.
Once you have selected the agent to assign to the contact, this will update on the contact account and agent account.
