Create an Event
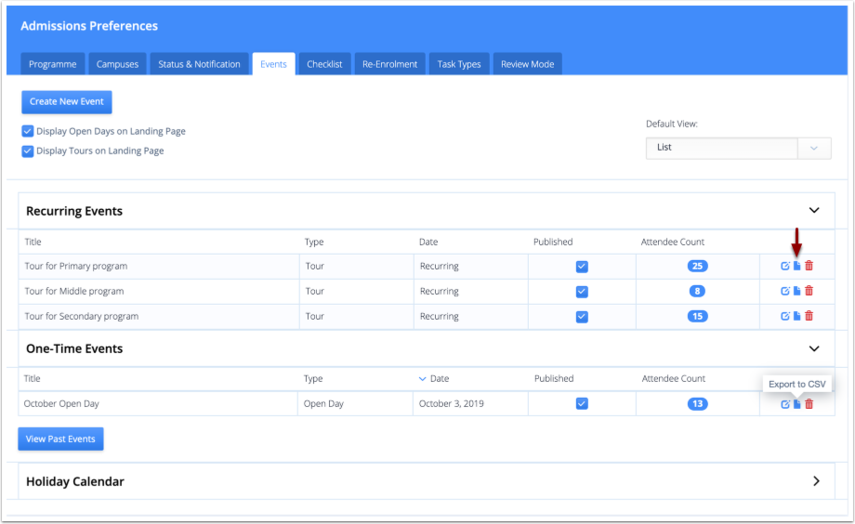
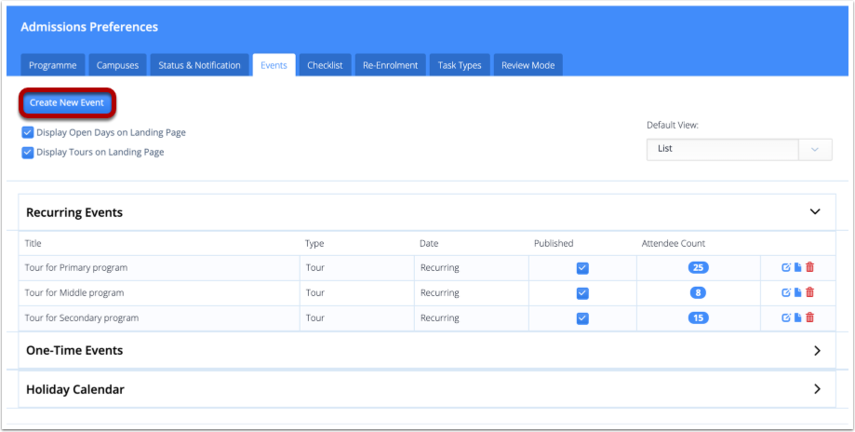
Navigate to Settings > Admissions > Events and click Create New Event.
Recurring Event vs One-Time Event
Recurring Event
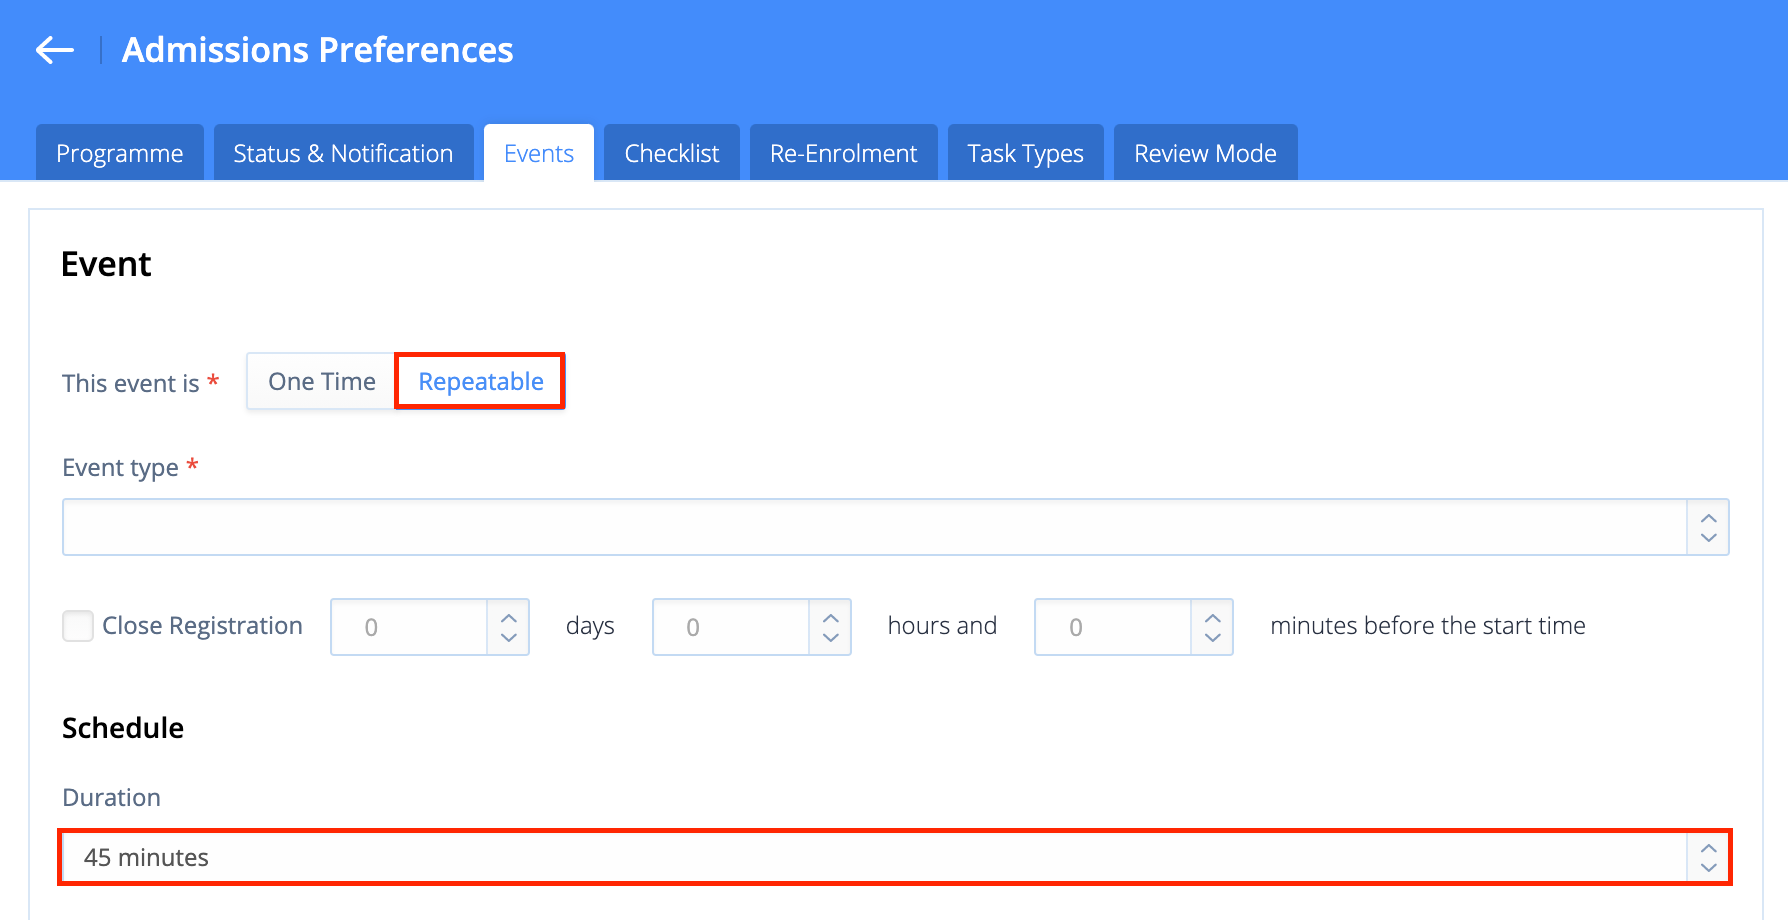
Select Repeatable at the top of the page to indicate the event is Recurring. Then, set the duration of the recurring events in the Duration dropdown field.
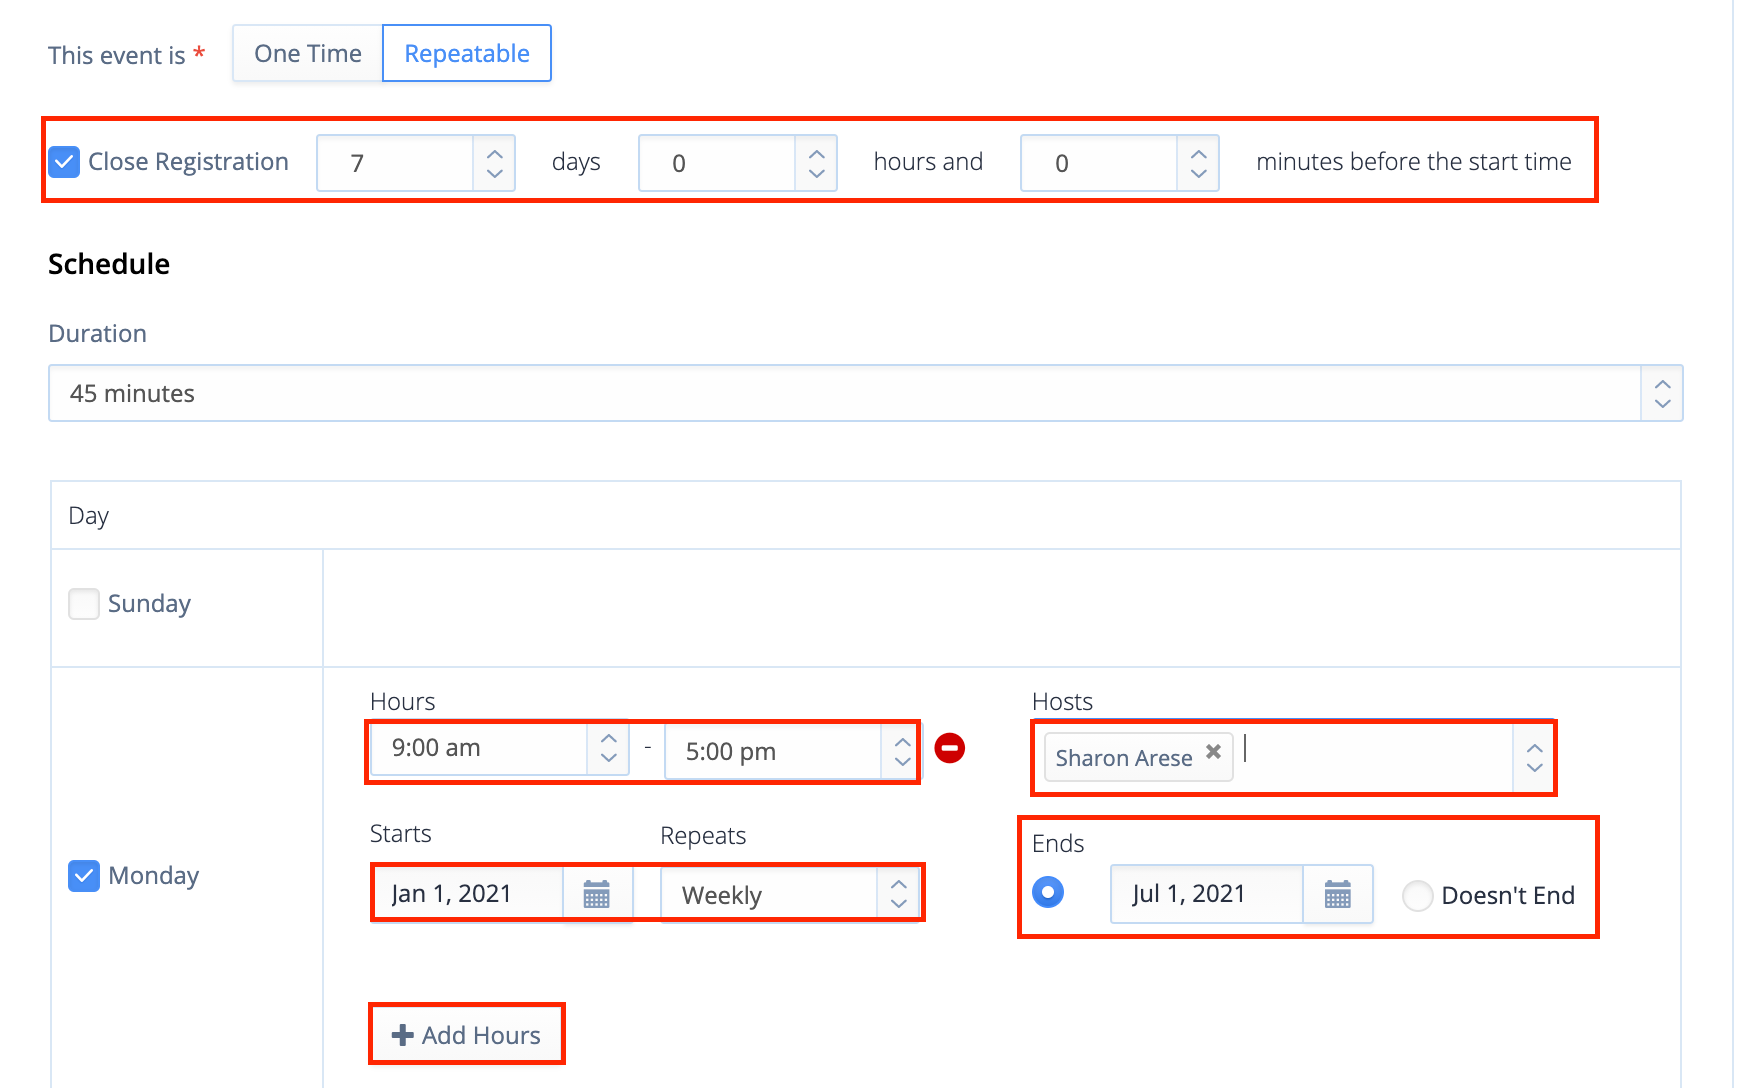
Customise the following settings for your event:
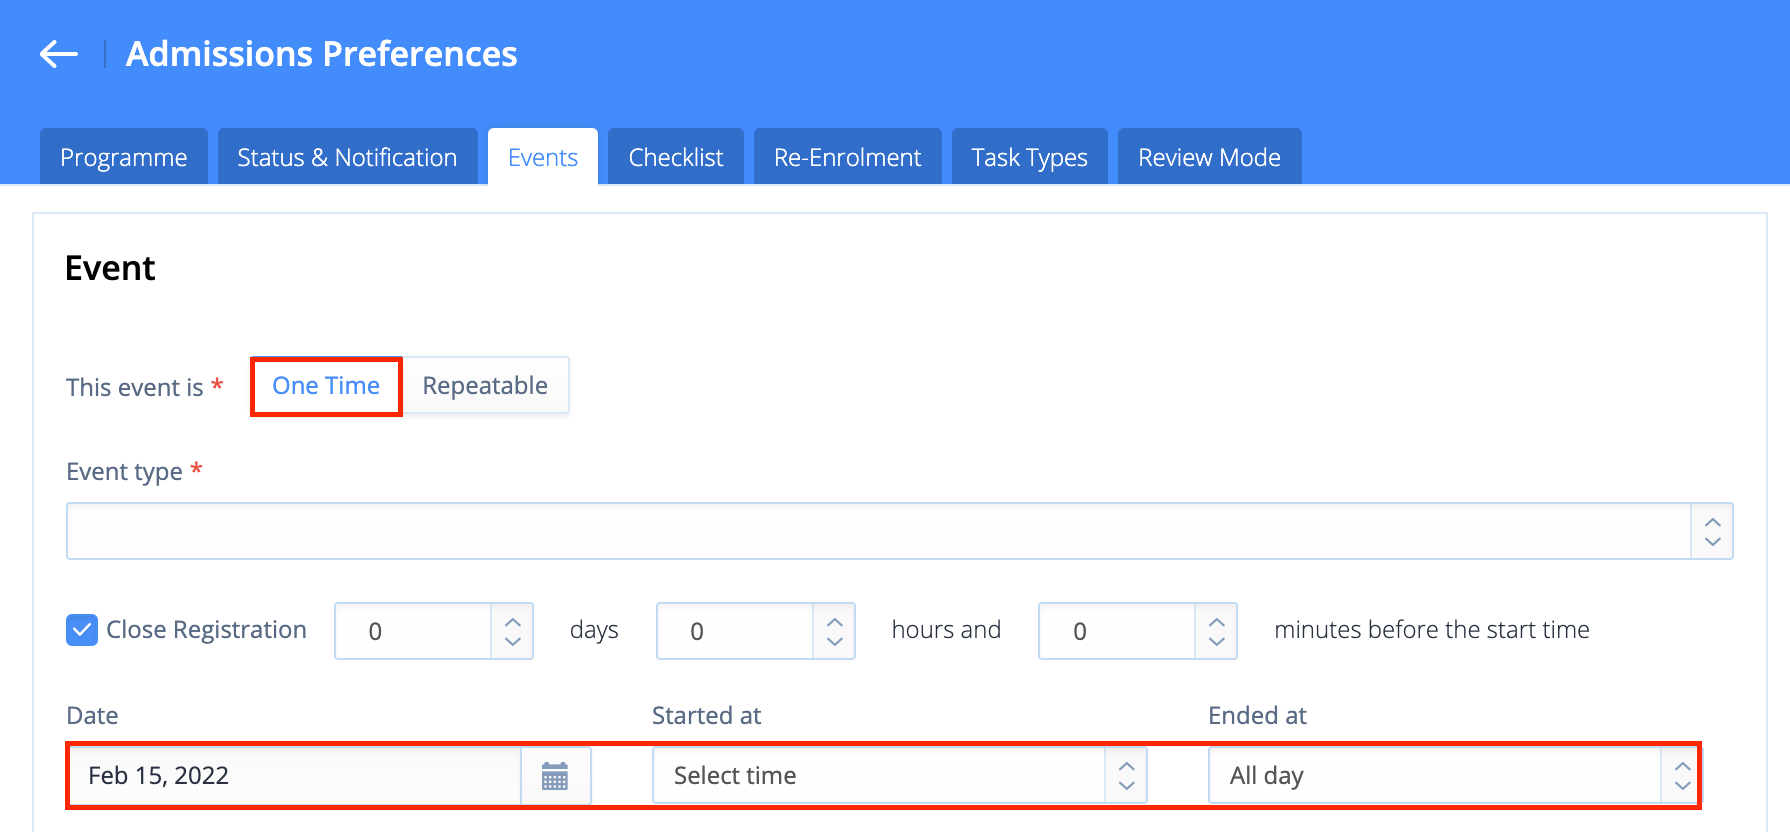
1. Check the box if you would like to Close Registration for the event, a certain number of days, hours and minutes before the start time
2. Set the Duration of each event
3. Tick the checkboxes for the Days of the week you would like to make this event available. Add available time slots to each day by clicking the +Add Hours button. Click on the Hours to adjust the ranges. Choose when the event Starts and how often it Repeats
4. Click on the Hosts box to select the Host(s) for each available time. Any admin user can be selected as the Host
5. Choose a date when the repeating of the event Ends or make it so that it Doesn't End
One-Time Event
Select One Time, then, set the Date, Start and End times.
Event Details
Select Open Day or Tour or Virtual Open Day or Virtual Tour in the Event Type dropdown.
Then, add in all relevant information including: Title, Description, and Location. To limit the capacity of the event, enter a number in the Capacity field.
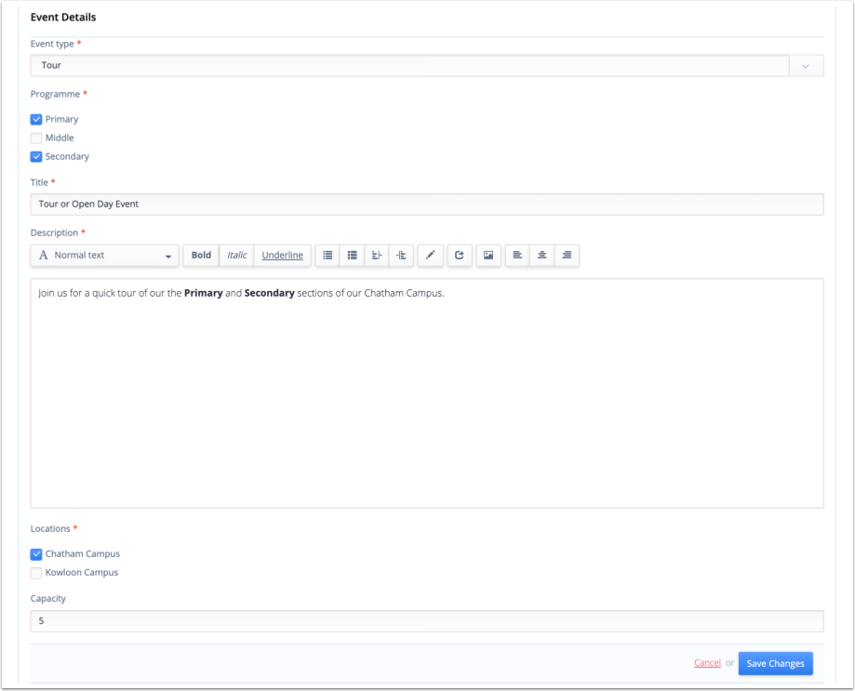
For Open Day events, once you input a number in the Capacity field, you can set the Limit Per Registration, to limit the number of people a single family can register. You can also change the Capacity question depending if you are recording attendees by number of parents, children, or both.
Lastly, click Save Changes to add the event.

Editing an Existing Event
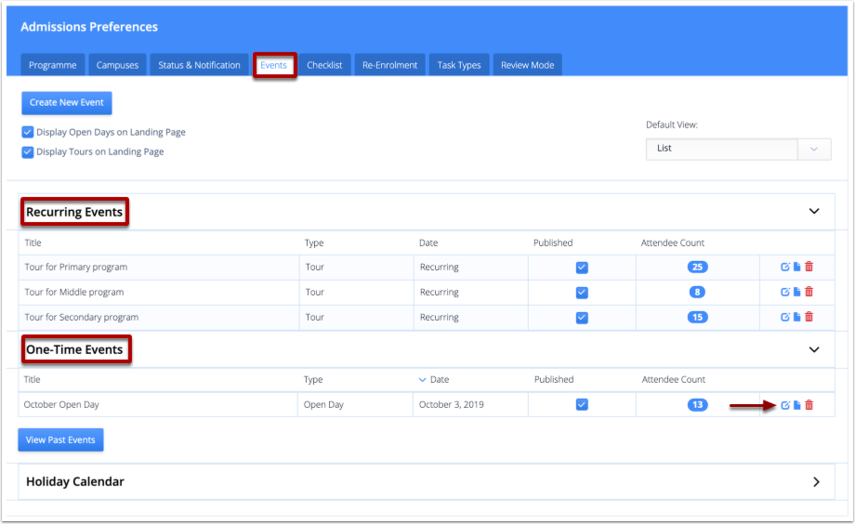
Navigate to Settings > Admissions > Events and click on the Recurring Event or One-Time Event header to view each type of event. Then, click on the Edit icon next to the desired Event.
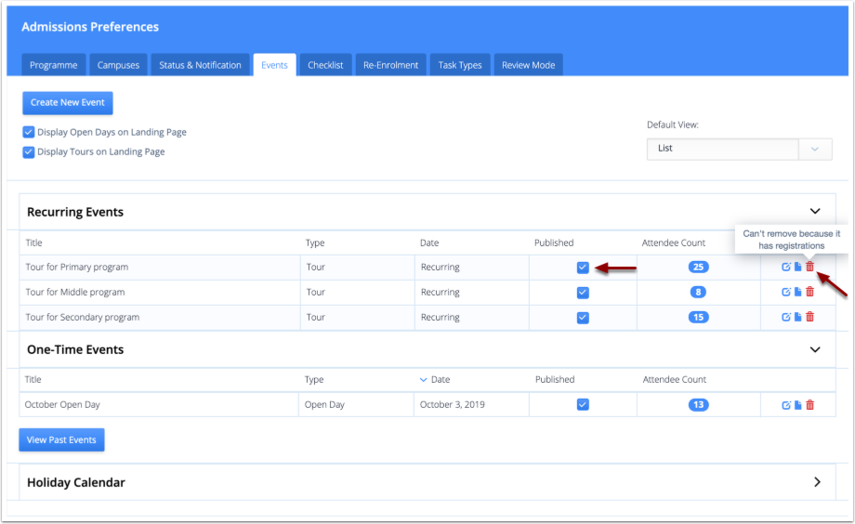
To remove an existing Event, click on the Delete icon to the right of the desired event. Please note an Event cannot be deleted if families are currently registered for it.
If you do not wish parents to be able to register for the event yet, untick the Published checkbox. You can tick it again later when you are ready for registrations.
Exporting a List of Participants
Navigate to Settings> Admissions> Events and click on the Export to CSV icon. An Excel spreadsheet will automatically be downloaded including the Open Day's title, date, names of participants and the number of attendees.
