Export the Information to be Updated
One way to bulk update information in OpenApply is to export current student information, update it via Excel, then re-import the updated information into OpenApply.
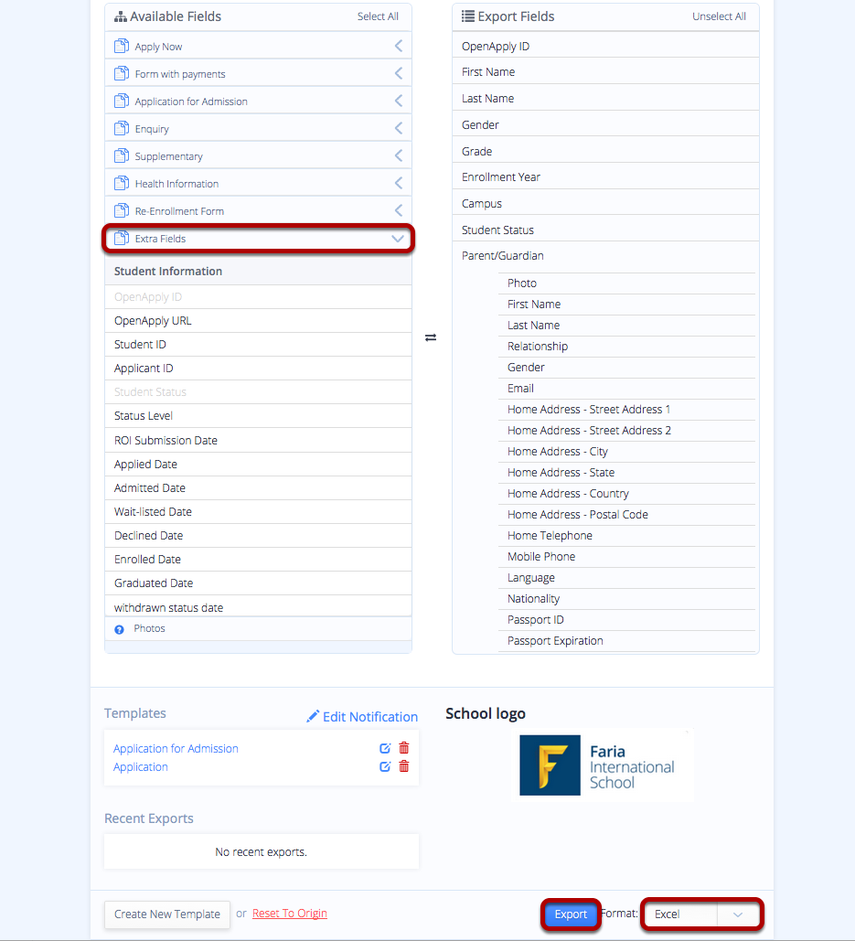
First, export the information you wish to update to an Excel file via Settings > Import & Export > Export. Drag and drop the fields that you wish to be updated as well as any fields required for an import. Click here for further information on Exporting Data from OpenApply.
Be sure to include the OpenApply ID field in your export, which can be found under the Extra Fields tab. This is the unique ID that will be used to identify and update the students.
Then select Excel and click the Export button. Please see below for all fields required for an import:
- First Name
- Last Name
- Grade
- Enrolment Year
- Student Status
- Campus (Only required if your school has more than one)
- Parent First Name
- Parent Last Name
- Parent Email
- Parent Gender
- Parent Relationship
Import the Updated Information
After updating the information on your Excel file, please save it as a csv file. You can then import the information back into OpenApply via Settings > Import & Export > Import.
Click here for further information on Importing Data to OpenApply.
At the top, select which application form you want to import into and tick the Update Existing box.
Scroll to the bottom of the page and upload your csv via the Browse button. Once you have selected your file, click the Next Step button.
Next, match your fields to make sure the columns in your spreadsheet will update the correct fields in OpenApply. As long as you did not change any column names while updating the Excel file, the match should happen automatically. Be sure to select OpenApply ID to match to OpenApply ID. When you are done click Confirm Fields at the bottom of the page.
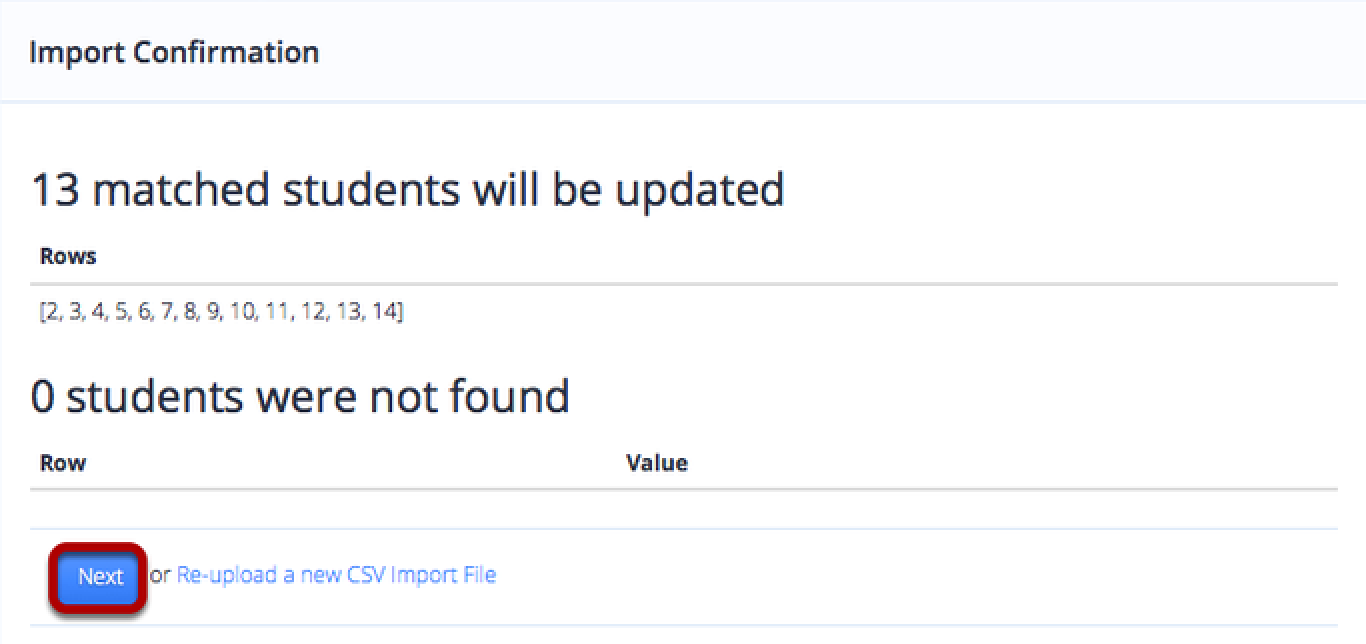
Confirm that all of your students were matched and click Next.
If your import looks fine, then click Confirm Import.
View import errors
You can check Settings > Import & Export > Recent Imports to see if the import was successful.
If an import is marked as failed, you can select the file name to review the reason behind the failure. Consider revising your import sheet according to the system's guidance and reattempting the import process.


