Via Settings > Import and Export > Import
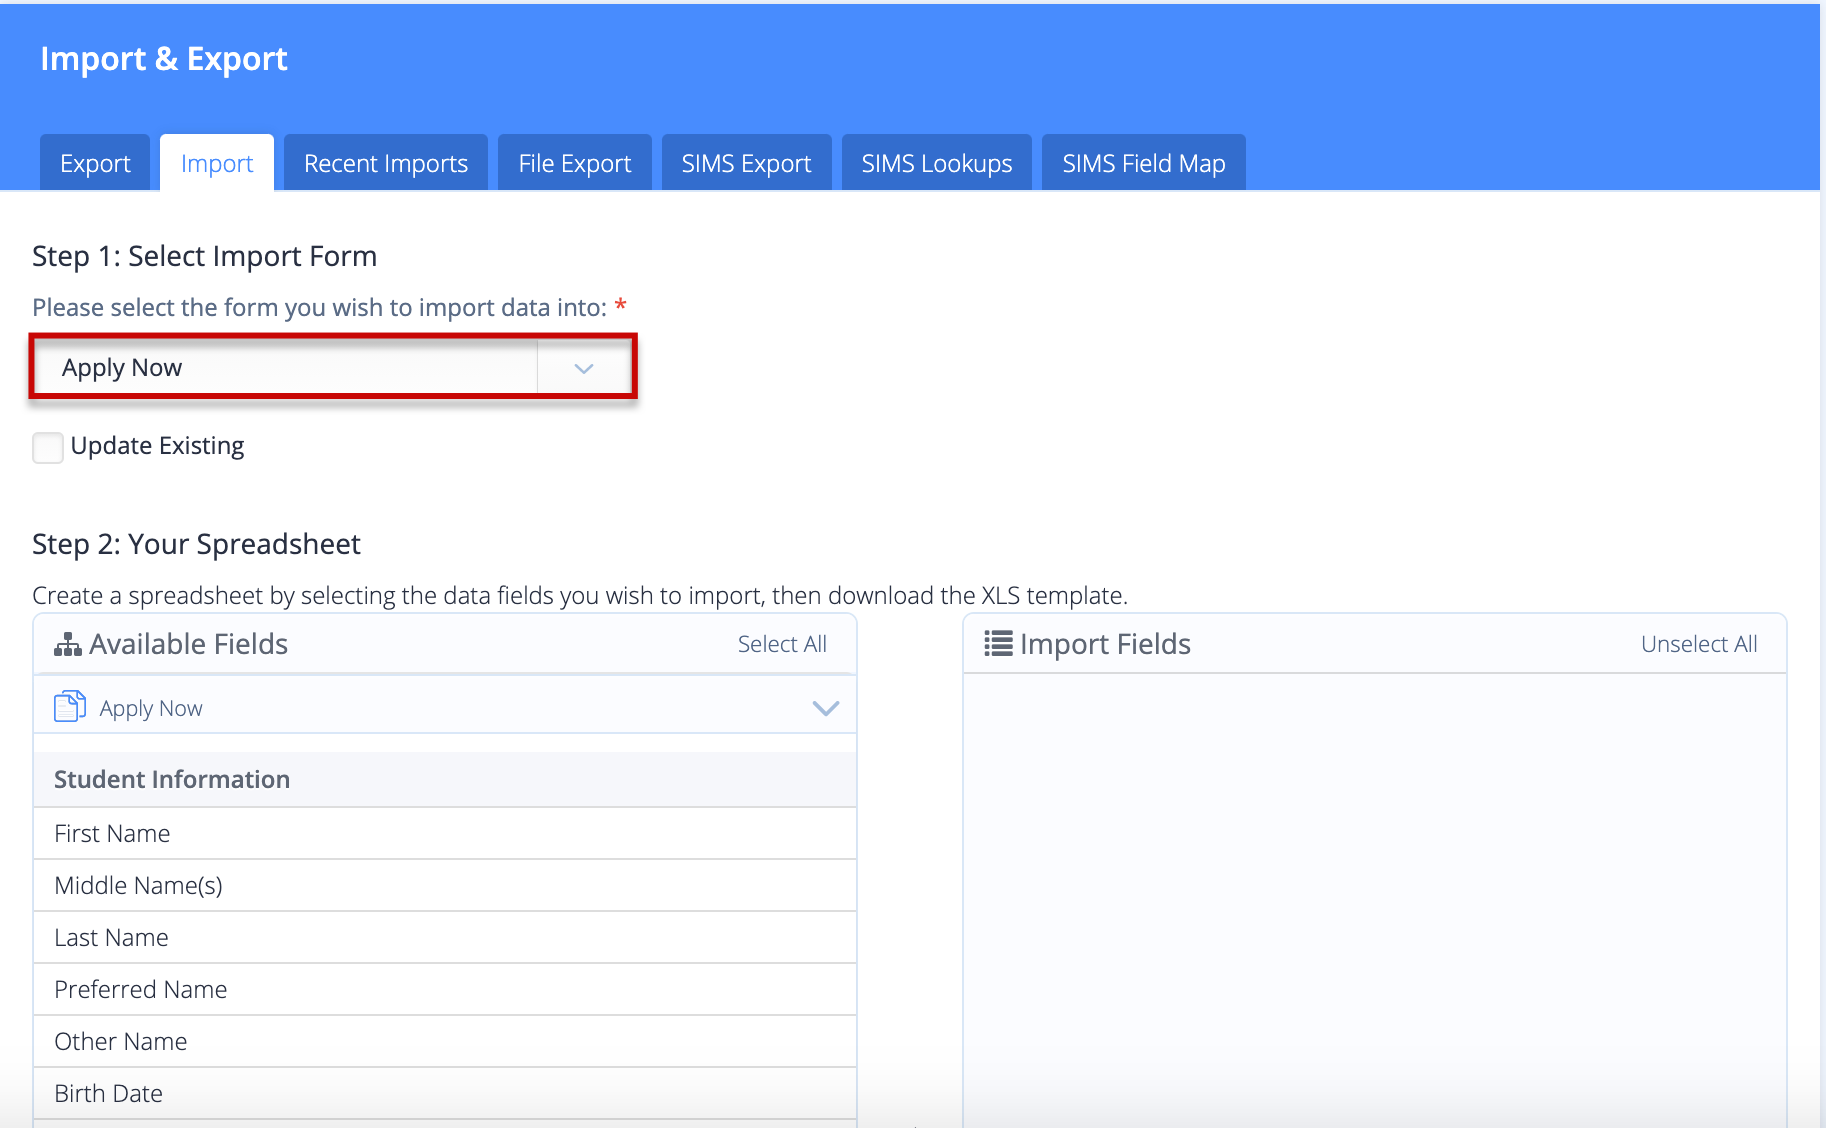
Navigate to Settings > Import & Export > Import
Select the application form that you wish to import the data to.
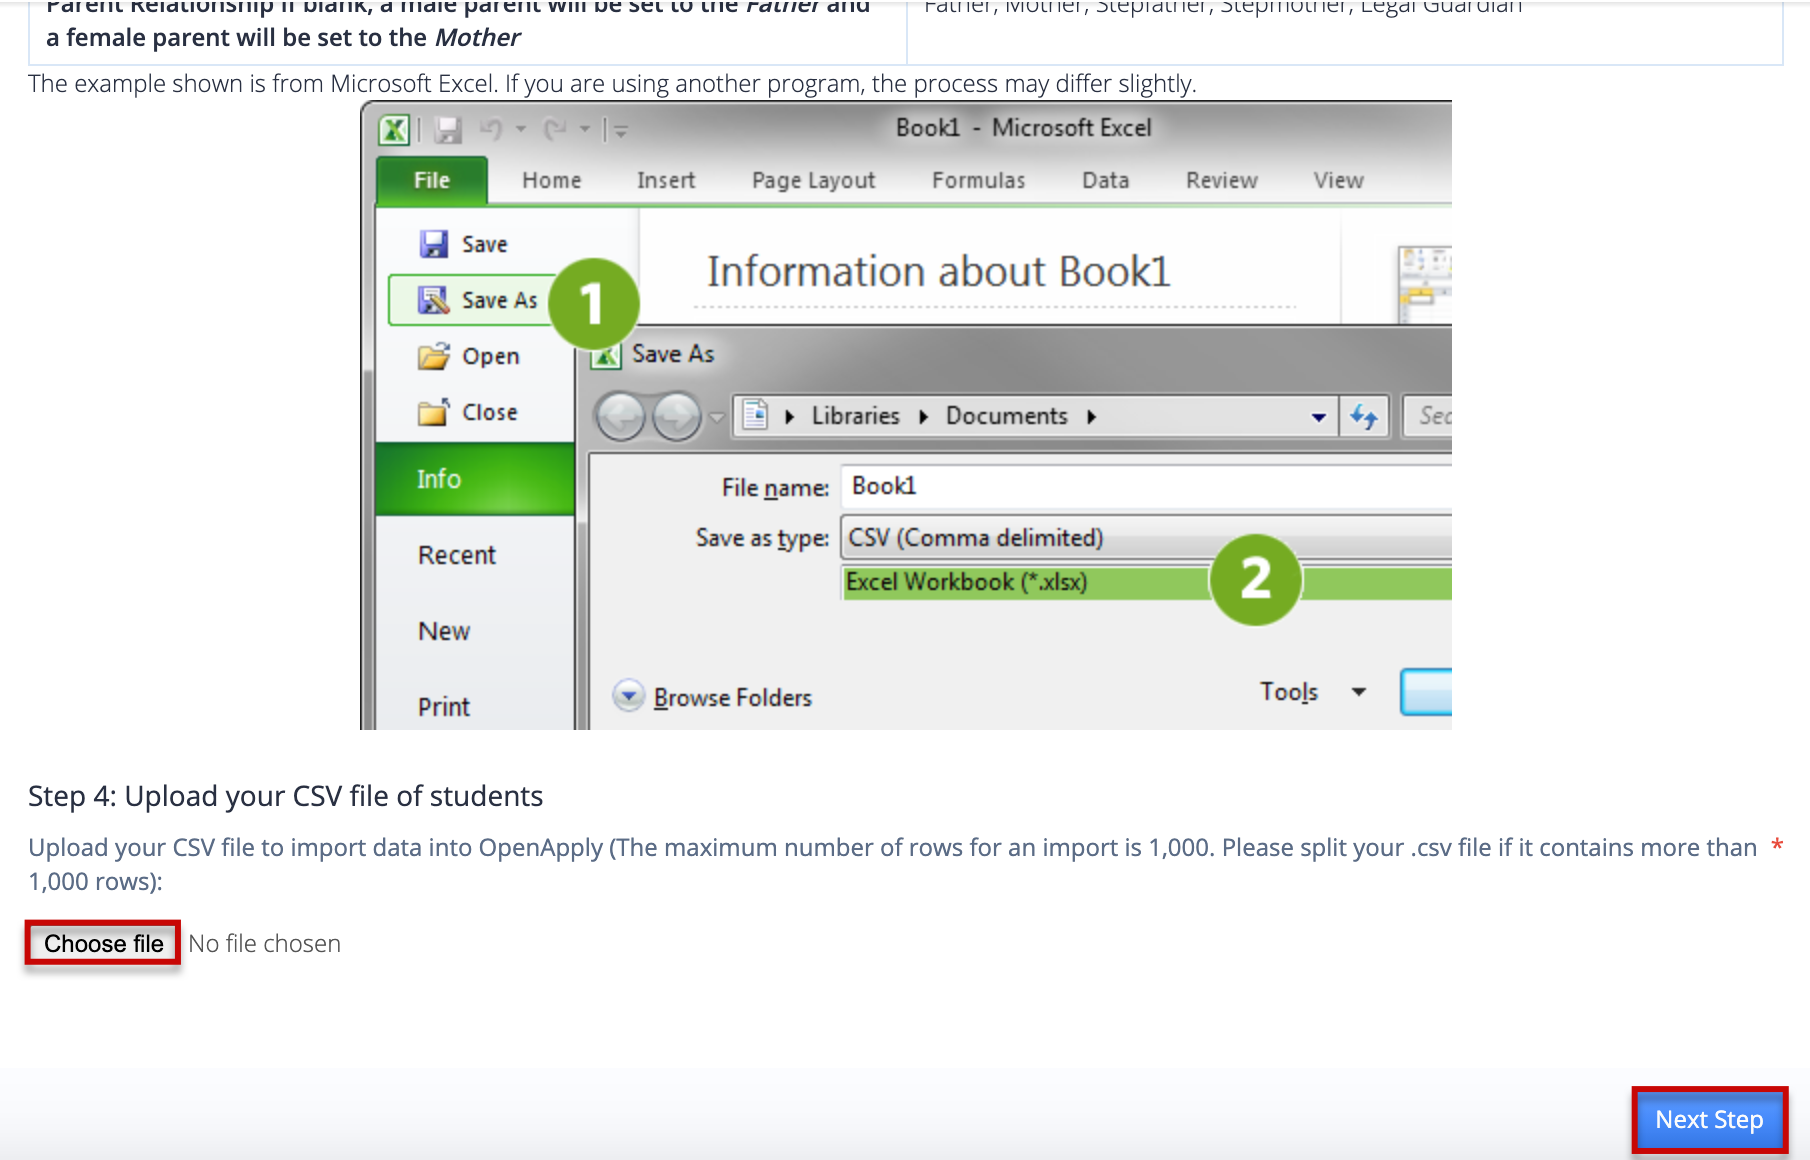
Click Choose File to select the CSV file that you wish to import. After selecting the CSV file, click the Next Step button.
Matching your Columns to Values
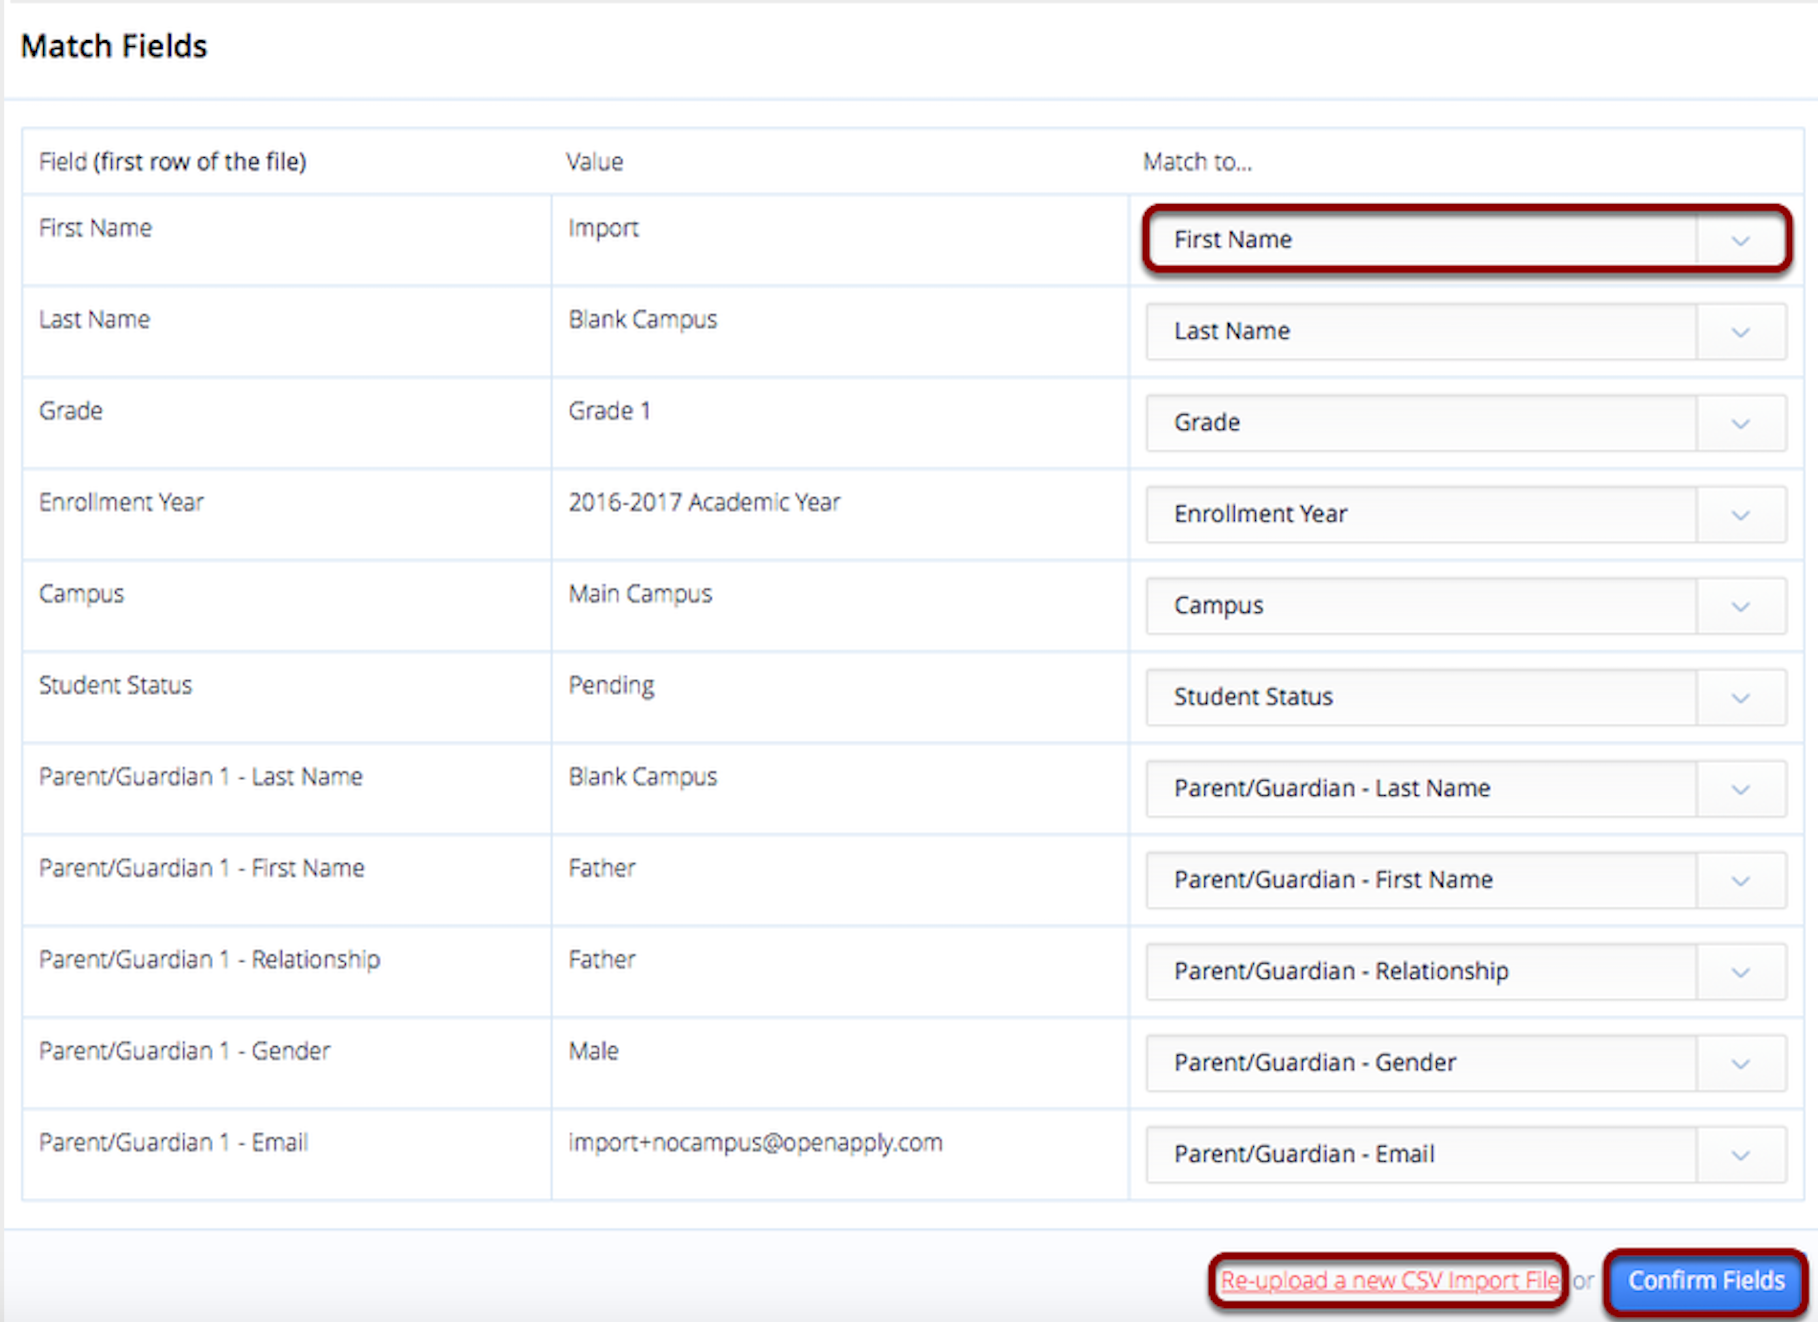
You will then be prompted to match the columns from your file to data fields in OpenApply. It is imperative that this is done carefully to ensure the accuracy of your CSV import. For example, if your first column is the First Name you will be prompted to match Column A to the First Name student information field on OpenApply.
OpenApply will try to automatically match any columns where the column heading matches the field name in OpenApply.
For any date fields, it is necessary to choose the date format that you have used in your file (MM/DD/YYYY or DD/MM/YYYY).
Once you have finished matching your fields, click the Confirm Fields button at the bottom of the screen.
Alternatively, click Re-upload a new CSV Import File to upload a new file, if you noticed any issues with your CSV file.
Confirming Your Import and the Column Format
Once you have confirmed your CSV import, it will be processed within several minutes, and you will receive an e-mail confirmation. By clicking back to to the Applicants roster, you can view the results of your import. You can navigate to Settings > Import & Export > Recent Imports to view the status of the import.
Your import column format will be saved for future reference, so that when you import for a second time, the prior column order will be used as a reference.


