Introduction to SIMS Exports
The SIMS Export function in OpenApply allows you to export data to a suitable format for importing to SIMS (Student Information System).
SIMS Export is an additional module for OpenApply. Please contact us at sales@openapply.com, if you are interested in enabling this module for your school.
Once the module is enabled, and OpenApply support team have done the initial configuration, the following steps are necessary, to complete configuration and use the SIMS Export function. OpenApply support team would schedule a training call with you, following the initial configuration, to guide you through this process.
Initial Setup of SIMS Export
School ID Setting
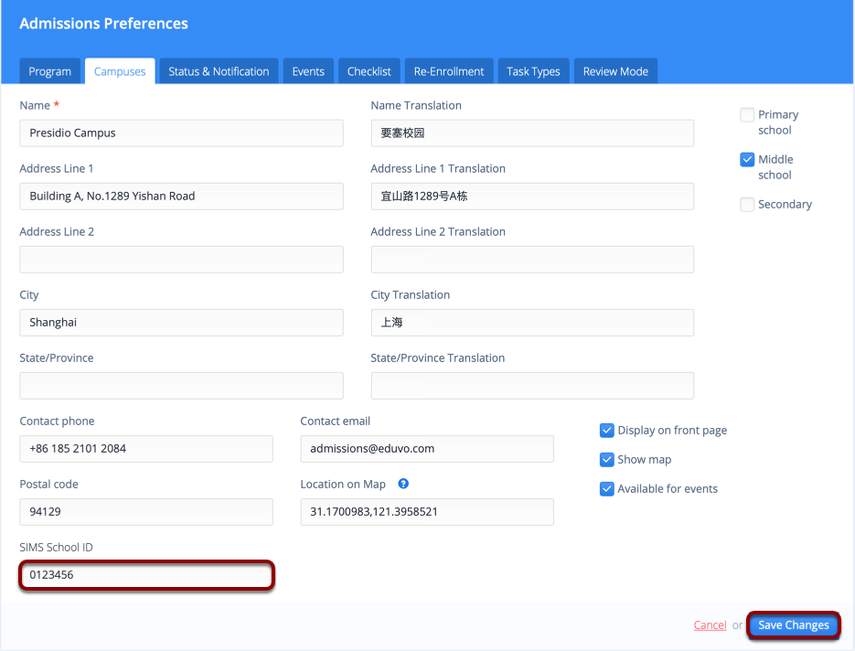
OpenApply supports multi-campus schools, so that a school may include students from multiple campuses in an export. As such, it is necessary to enter the SIMS School ID for each campus in OpenApply.
- To set the SIMS School ID navigate to Settings > School Settings > Campuses, then click the pencil icon to edit each campus
- Enter the SIMS School ID for that campus, and click to Save Changes
Please note that in a multi-campus export, OpenApply will group all of the students for a given campus together into a single XML file. If there are students from different campuses included in the same export, they will be grouped together into separate XML files with that campus’ School ID. These files will be compressed into a single ZIP file for download.
Mandatory Field Mapping
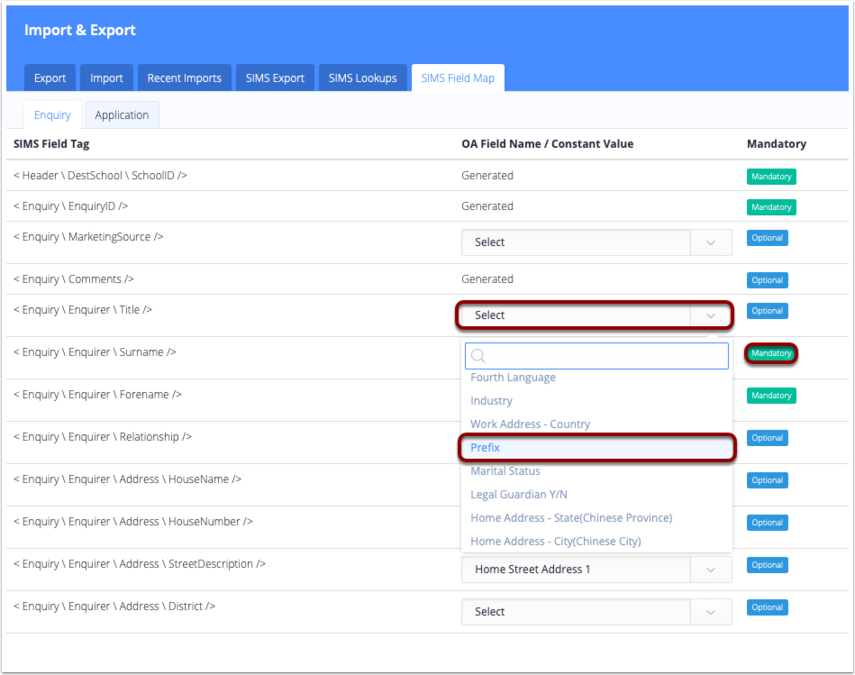
- Navigate to Settings > Import & Export > SIMS Field Map to map each of your SIMS fields to the corresponding fields in OpenApply
- Please ensure that all Mandatory fields (highlighted in green) are mapped. OpenApply Support will assist with this process
- We recommend first testing an export with basic field mapping before proceeding to set up the custom field mapping
Please contact us at support@openapply.com for assistance or advice on mapping your fields.
SIMS Lookups
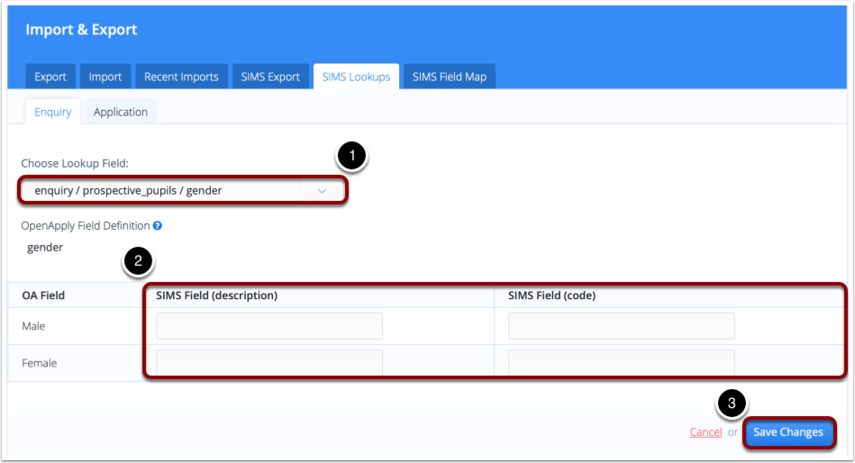
It is possible to assign custom value mappings so that a predefined OpenApply field (Dropdown Menu, Multiple Choice or Checkbox type field) can be assigned descriptions and SIMS field codes that the SIMS system can interpret.
Navigate to Settings > Import & Export > SIMS Lookups to assign SIMS Field descriptions and codes, as necessary
- Click to Choose Lookup Field that you would like to assign SIMS Field descriptions and codes for
- Enter the relevant SIMS Field (description) and SIMS Field (code), for each possible field value
- Save Changes
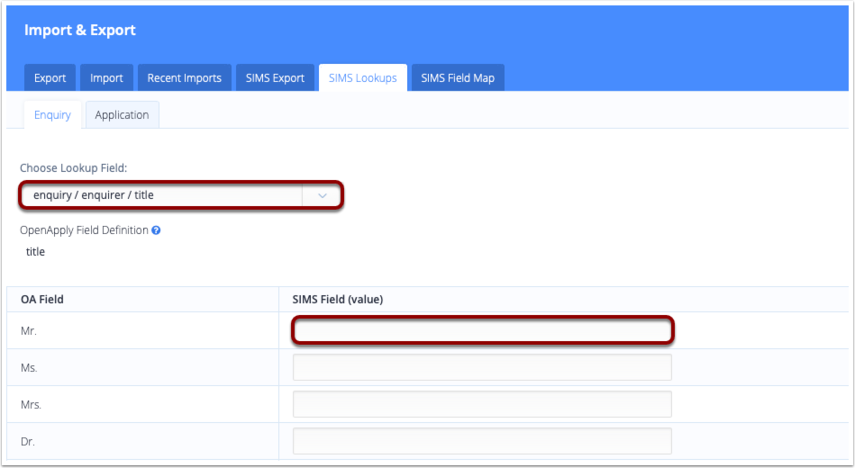
Some lookup fields, such as title/prefix, only require a value definition, rather than a description/code pair.
In this case, simply enter the corresponding SIMS Field (value) for each possible value.
Exporting SIMS Data via the Applicants Roster
You can export SIMS Data for a filtered list of applicants directly via the Enquiries, Applicants or Students roster. This can be done by taking the following steps:
- Click the Filter to filter for whichever groups of applicants you require. For example, you can filter by grade, status, gender or custom fields
- Click to select some or all of the students
- Click Export, then select SIMS XML Enquiry Export or SIMS XML Application Export
You can then proceed to the export page, to select the fields and export them for the selected students.
Selecting Fields to Export
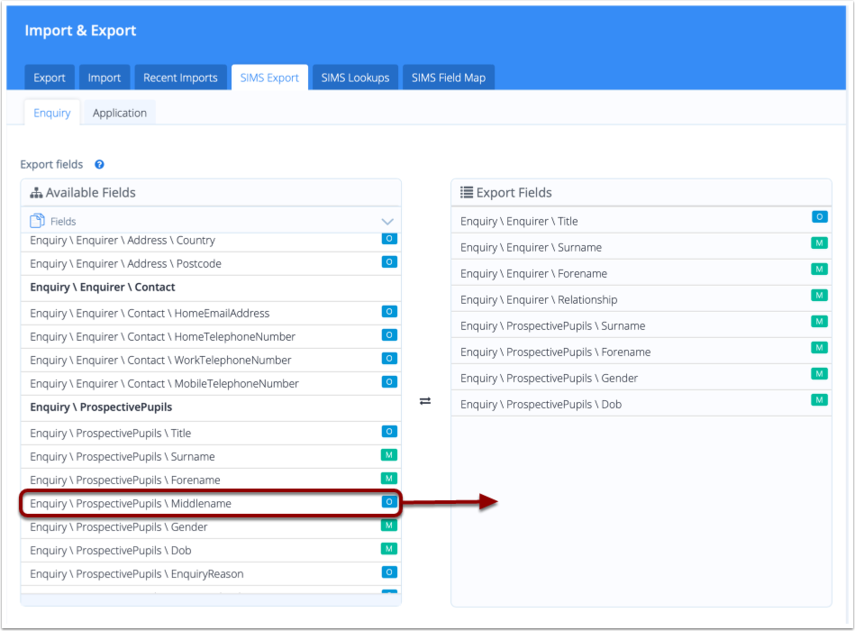
Drag and drop from the Available Fields on the left, to the Export Fields on the right, to select the fields you would like to export.
Make sure to include all of the mandatory fields (indicated with a green 'M').
On the SIMS Export page, you can also do the following:
- Edit or delete templates
- Add an optional Comment, which will be included the export. The comment can have a maximum of 512 characters
- Assign a Template name and Create New Template with the selected fields
- Enter the Export file name
- Click Export to proceed with the export
