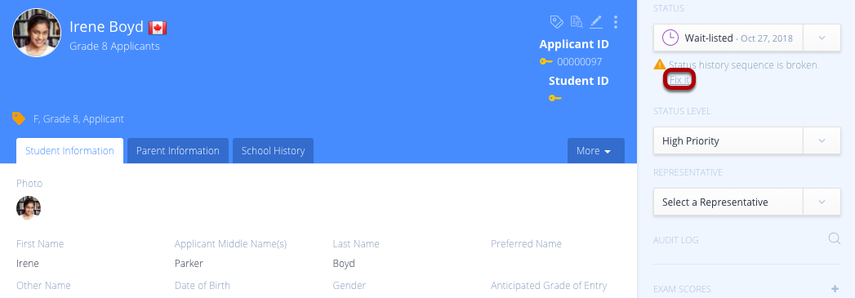
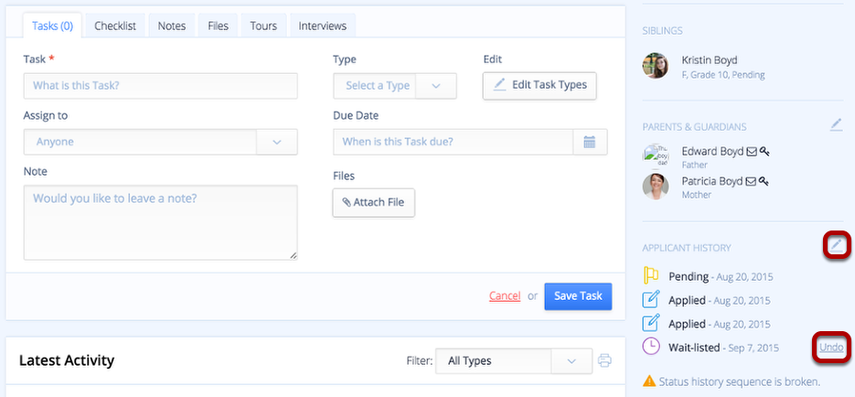
You can also click the pencil icon next to Applicant History to bring up the Status Editor. If a recent status change was made in error, you can simply click Undo to roll back to the previous status.
Editing the history to resolve issues or to add previous statuses
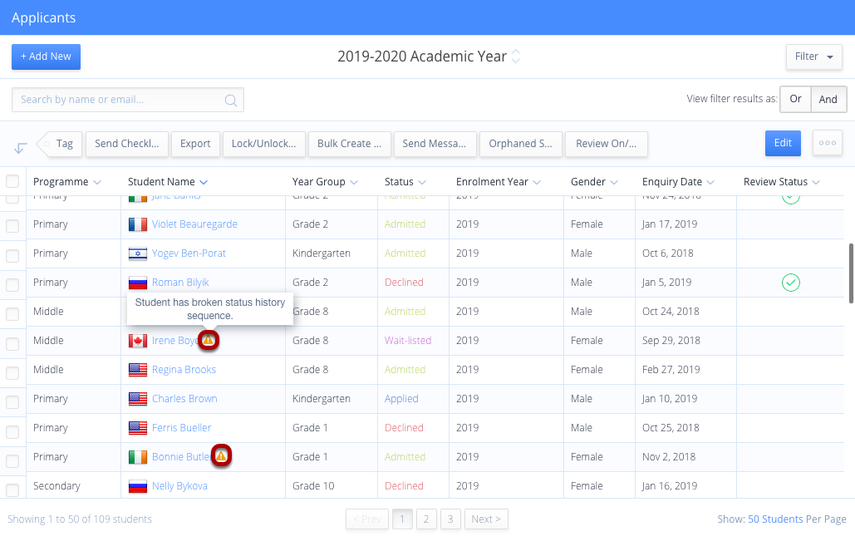
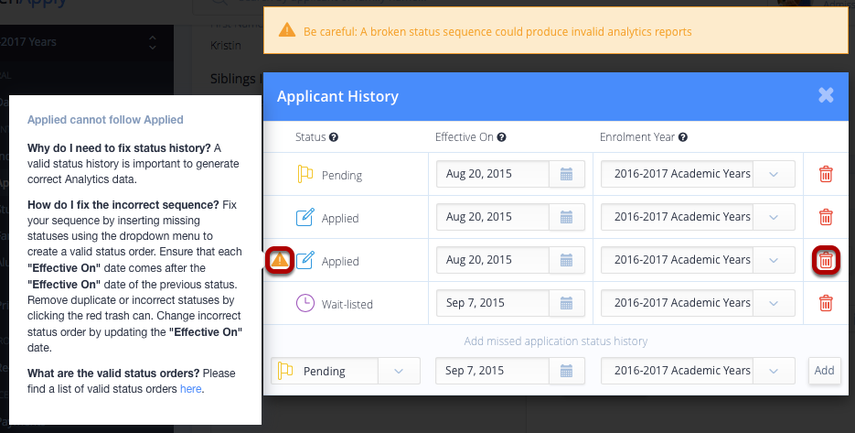
When viewing the Applicant History Status Editor for an applicant, any invalid status changes will be highlighted by an orange warning triangle. If you hover over the warning triangle, the system will notify you why this status history was invalid. In this case, the applicant has the Applied status twice in a row, so the error message shows "Applied cannot follow Applied".
In this example, we can resolve the broken history by clicking the trash can to delete the additional Applied status.
Re-Ordering Statuses
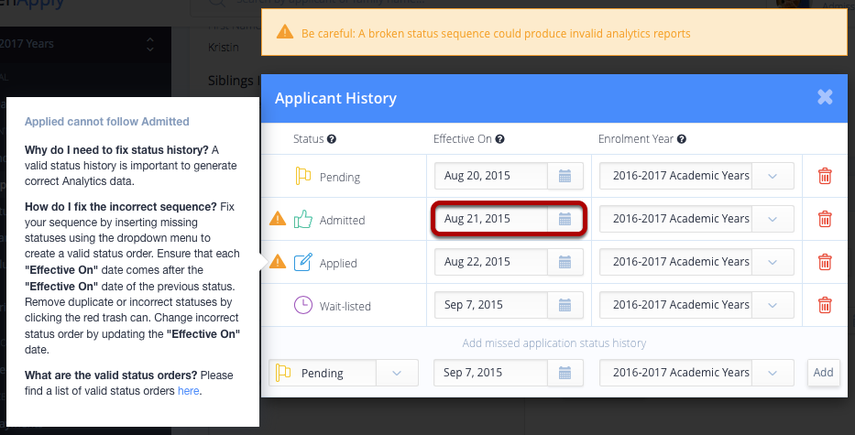
In the following example Admitted is before Applied. This can be resolved by setting the Effective On date for Admitted to be after the Effective On date for Applied.
Changing the Enrolment Year of a Status
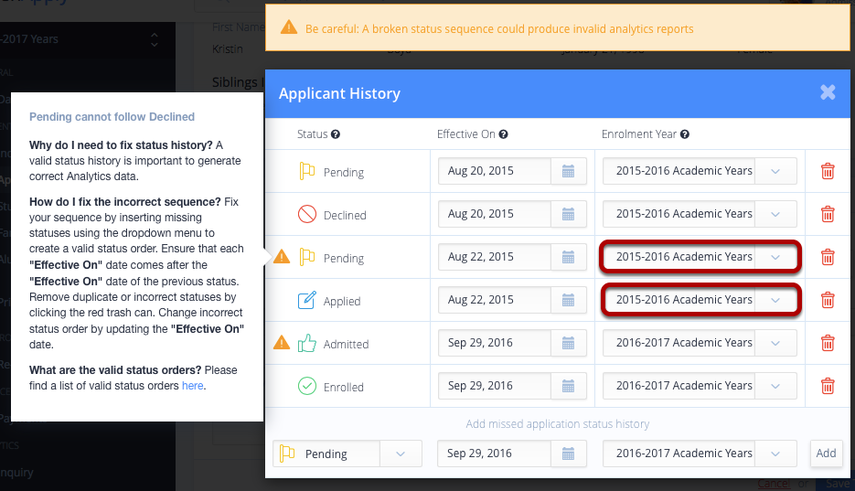
Other invalid status histories can be resolved by changing the Enrolment Year, if for example an applicant applied, was declined, and then applied again.
In the following example, the applicant was Pending then Declined for 2015-16, then successfully applied again for the subsequent year. This can be resolved by changing the Enrolment Year for the second Pending status and for the Applied status to 2016-2017 Academic Year.
Adding Previous Statuses
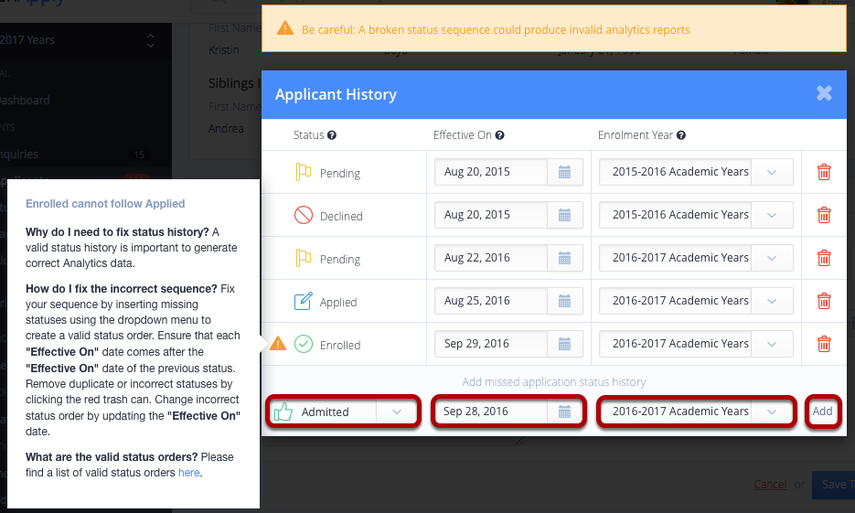
Previous or missing statuses can be inserted if necessary using the Add button.
In the following example, this can be used to add an Admitted status in between Applied and Enrolled.