Adding Academic Years
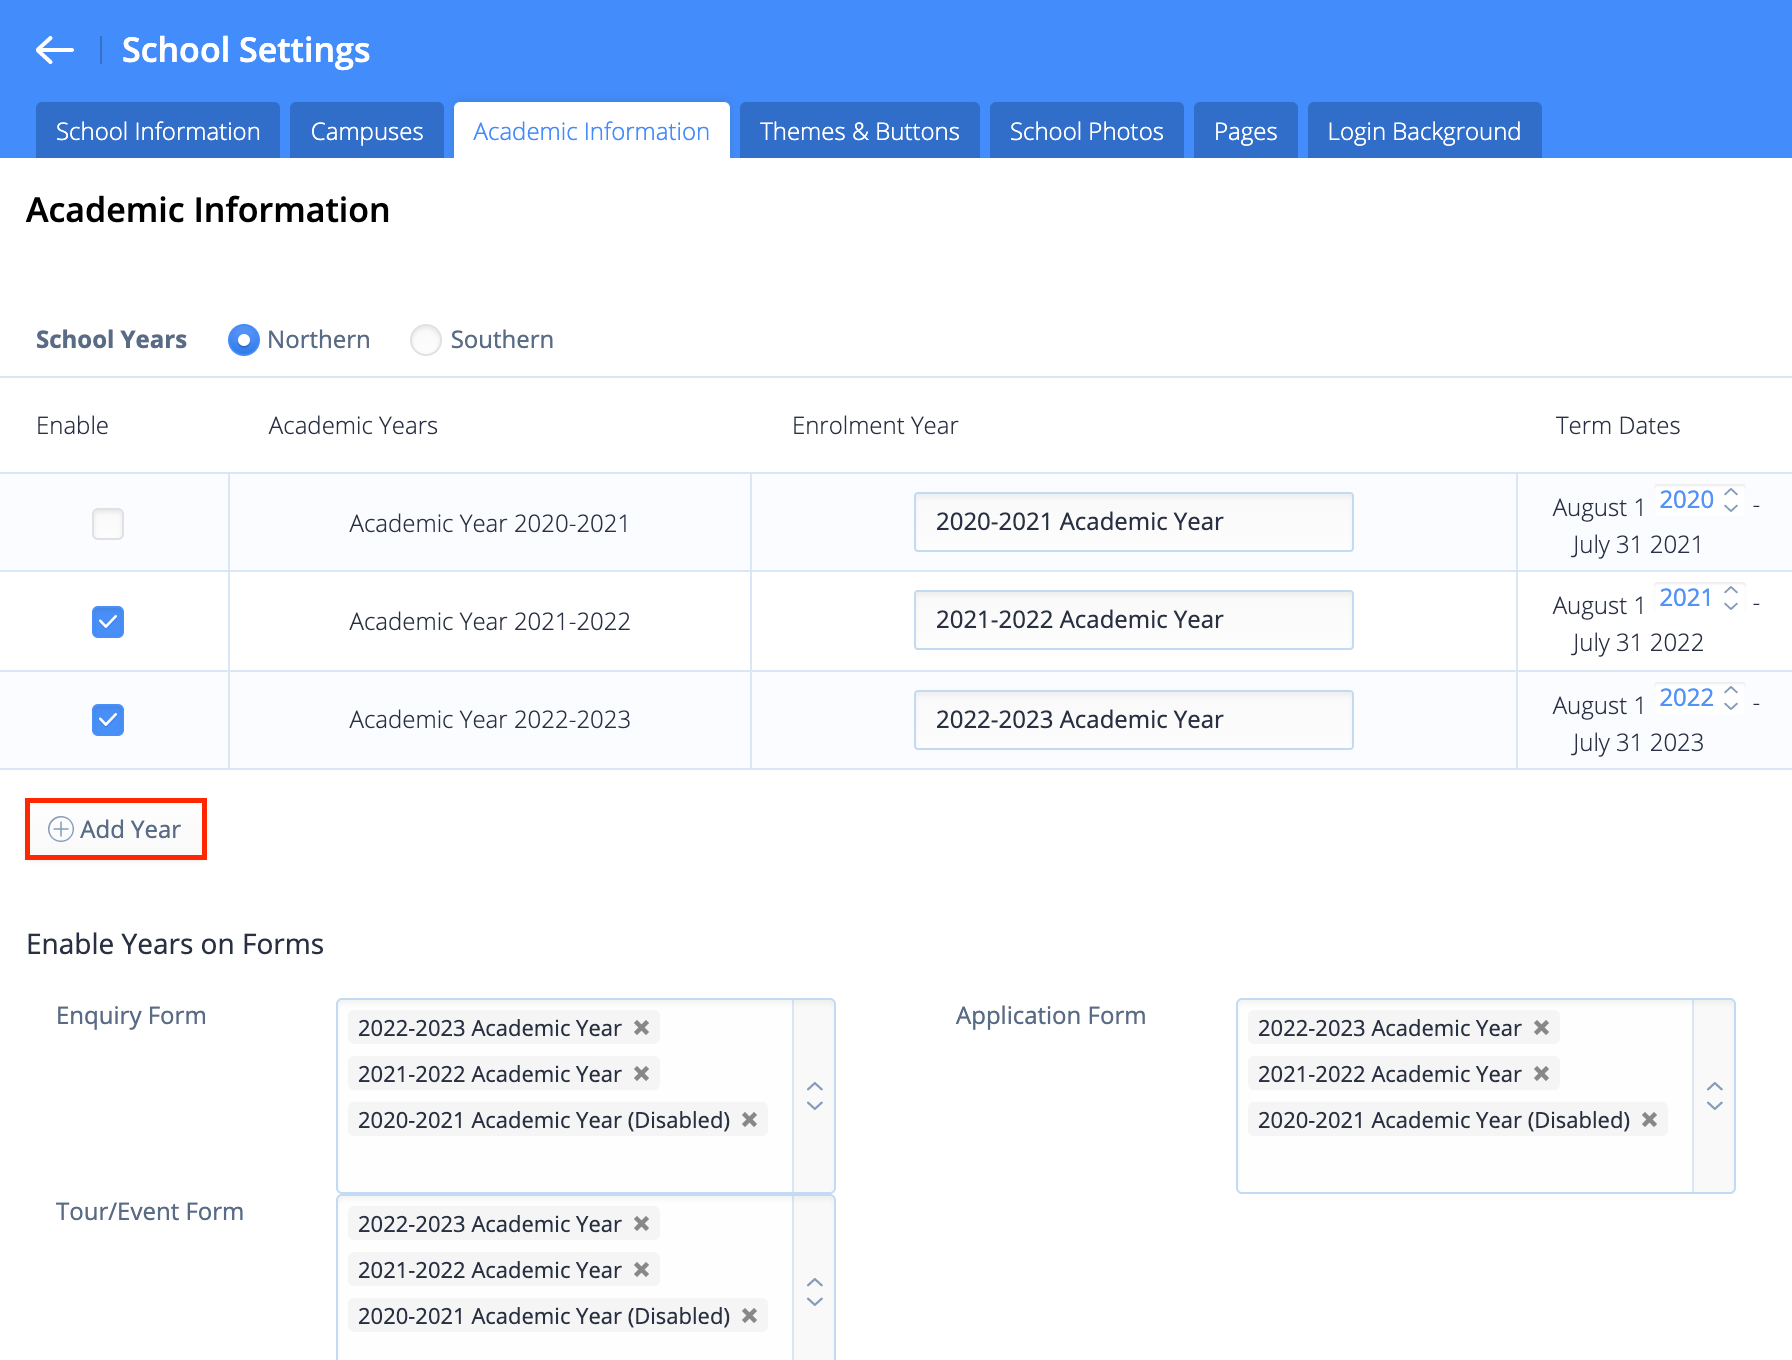
The new year will automatically default to the next available year. You can edit the name of the Academic Year in the Enrollment Year box. When you are done, click the Save Changes button at the bottom.
To add an earlier year, change the selected year under Term Dates after adding the new year.
Enabling Years on Forms
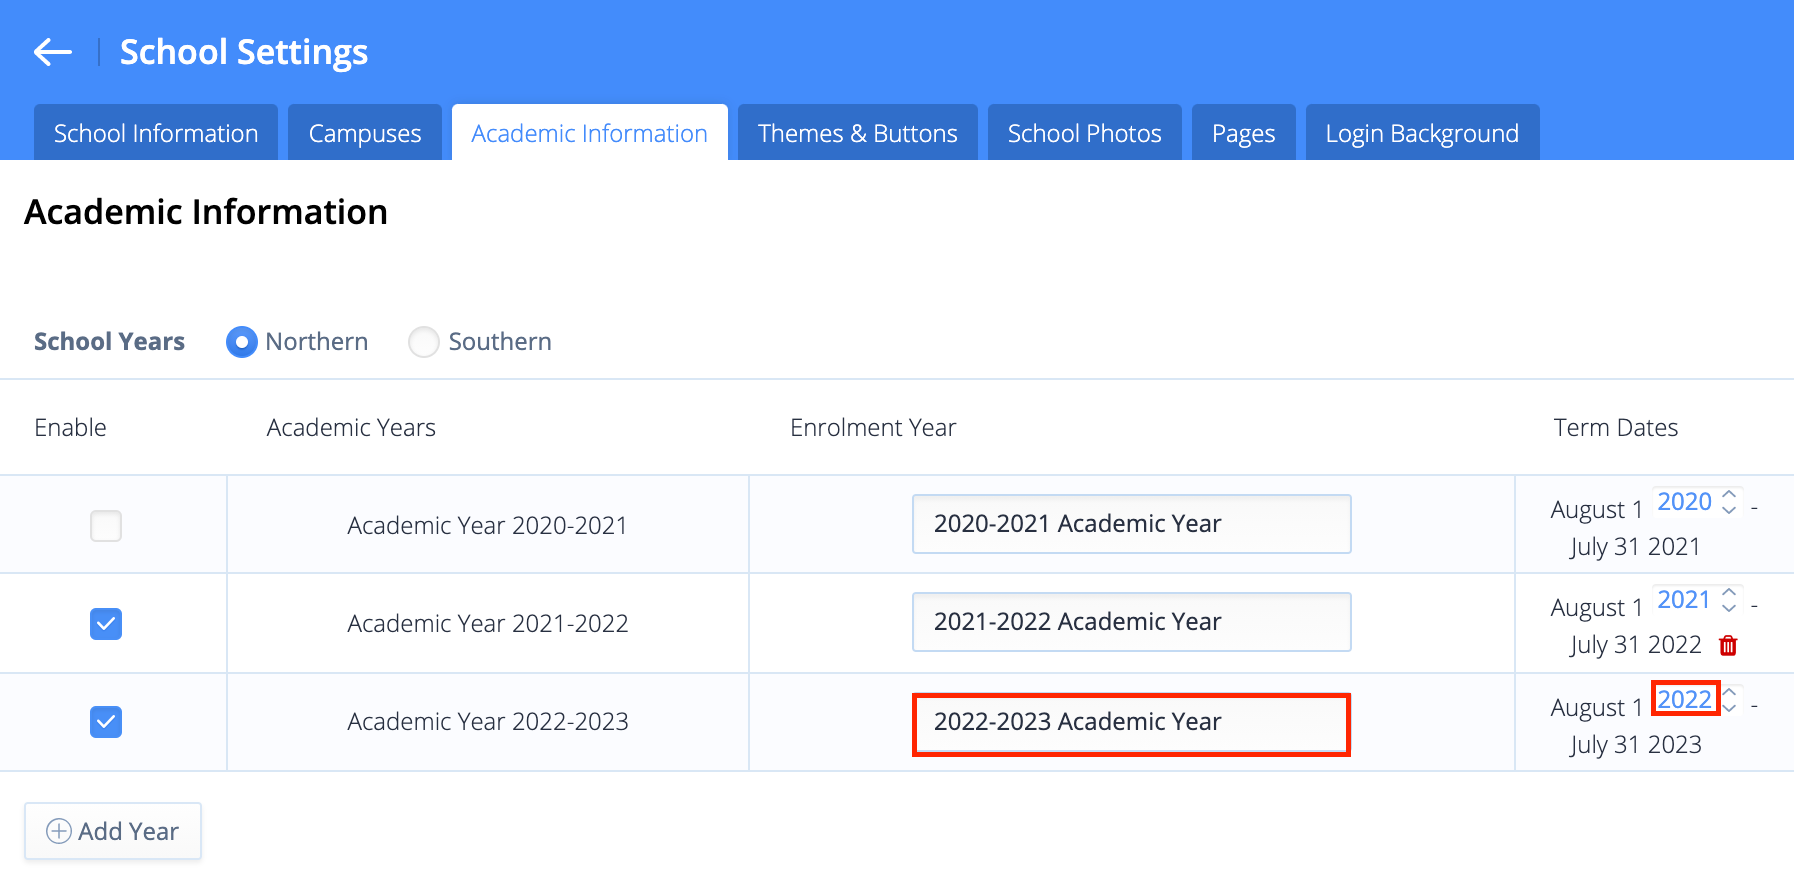
Enabling years on forms allows you to have different Academic Years available for different form types that parents may complete. For example, if you would like to allow parents to enquire or register for events for future years, but are only accepting applications for the next Academic Year.
Choose which Academic Years are available for the following form types; Enquiry Form, Application Form, Tour/Event Form
If the year is disabled in the Academic Year settings above, this will be indicated, for clarity, and parents will not be able to select this year.
Editing Existing Years
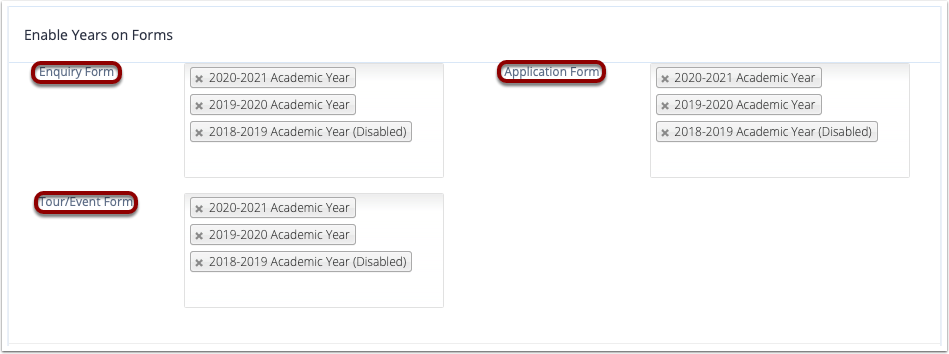
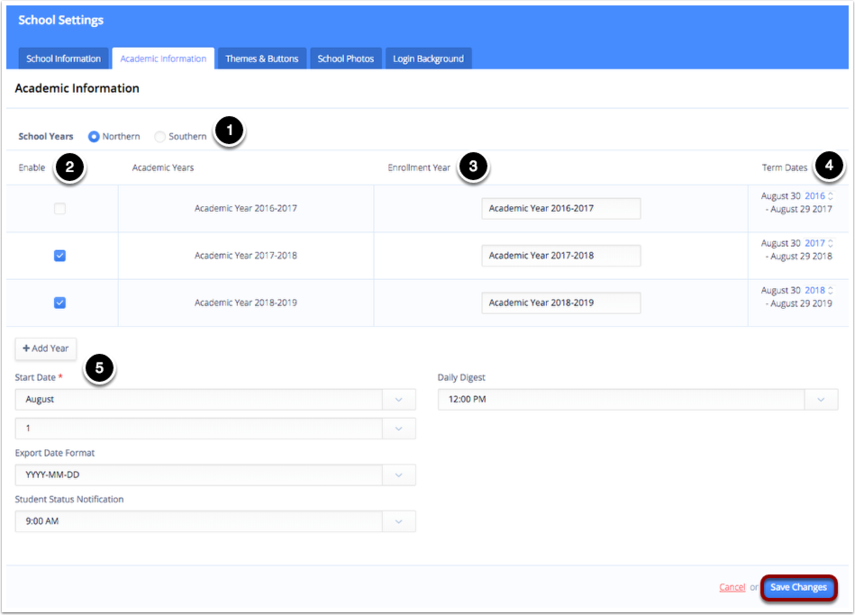
A number of settings can be edited for your existing Academic Years:
1. You can select Northern or Southern hemisphere school years.
2. Academic Years can be enabled or disabled via the Checkbox to the left of the year.
3. You can edit the name of the Academic Year in the Enrollment Year box.
4. The start year can be edited under Term Dates.
5. The start month and date can be selected from the Start Date dropdowns.
Once you are finished, click the Save Changes button.
Other Academic Year Settings
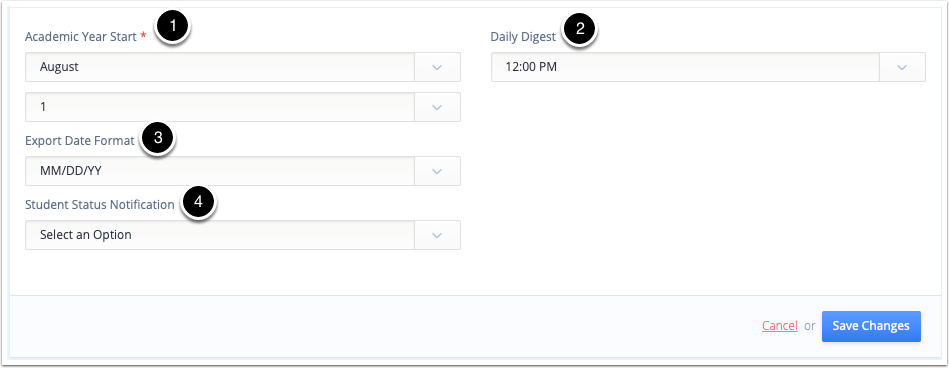
1. The Academic Year Start month and date can be selected. This is the date when the system moves from one Academic Year to the next. This also determines the Term Dates indicated above.
2. Select the time that you would like to receive the Daily Digest email each day
3. Select the Export Date Format, to choose how dates are exported to Excel
4. Set a Student Status Notification time, to set the time that scheduled status notification emails are sent
Once you are finished, click the Save Changes button.
