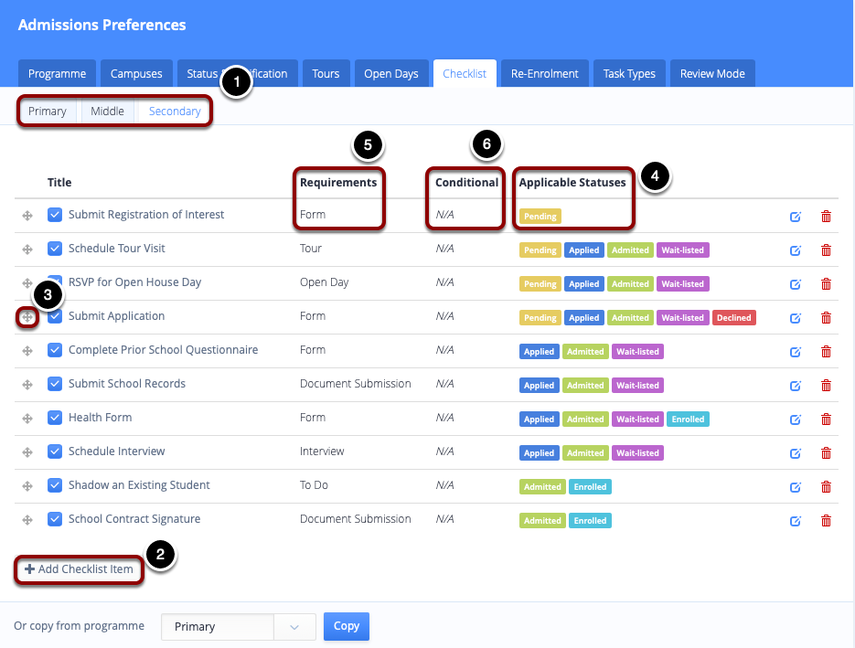
Navigate to Settings > Admissions > Checklist
- Select which Programme you would like to add an item to
- Click + Add Checklist Item to add a new checklist item
- Drag and drop the arrow icon to re-order checklist items
- The Applicable Statuses shows which statuses of applicant each checklist item applies to
- The Requirements show what type of checklist item this is, i.e. what must be done in order to complete this checklist item
- The Conditional column shows which fields a checklist item is conditional on. 'N/A' indicates that this checklist item is not conditional on any fields.
Further advice on adding and editing conditional checklist items can be found here.
Adding a New Checklist Item
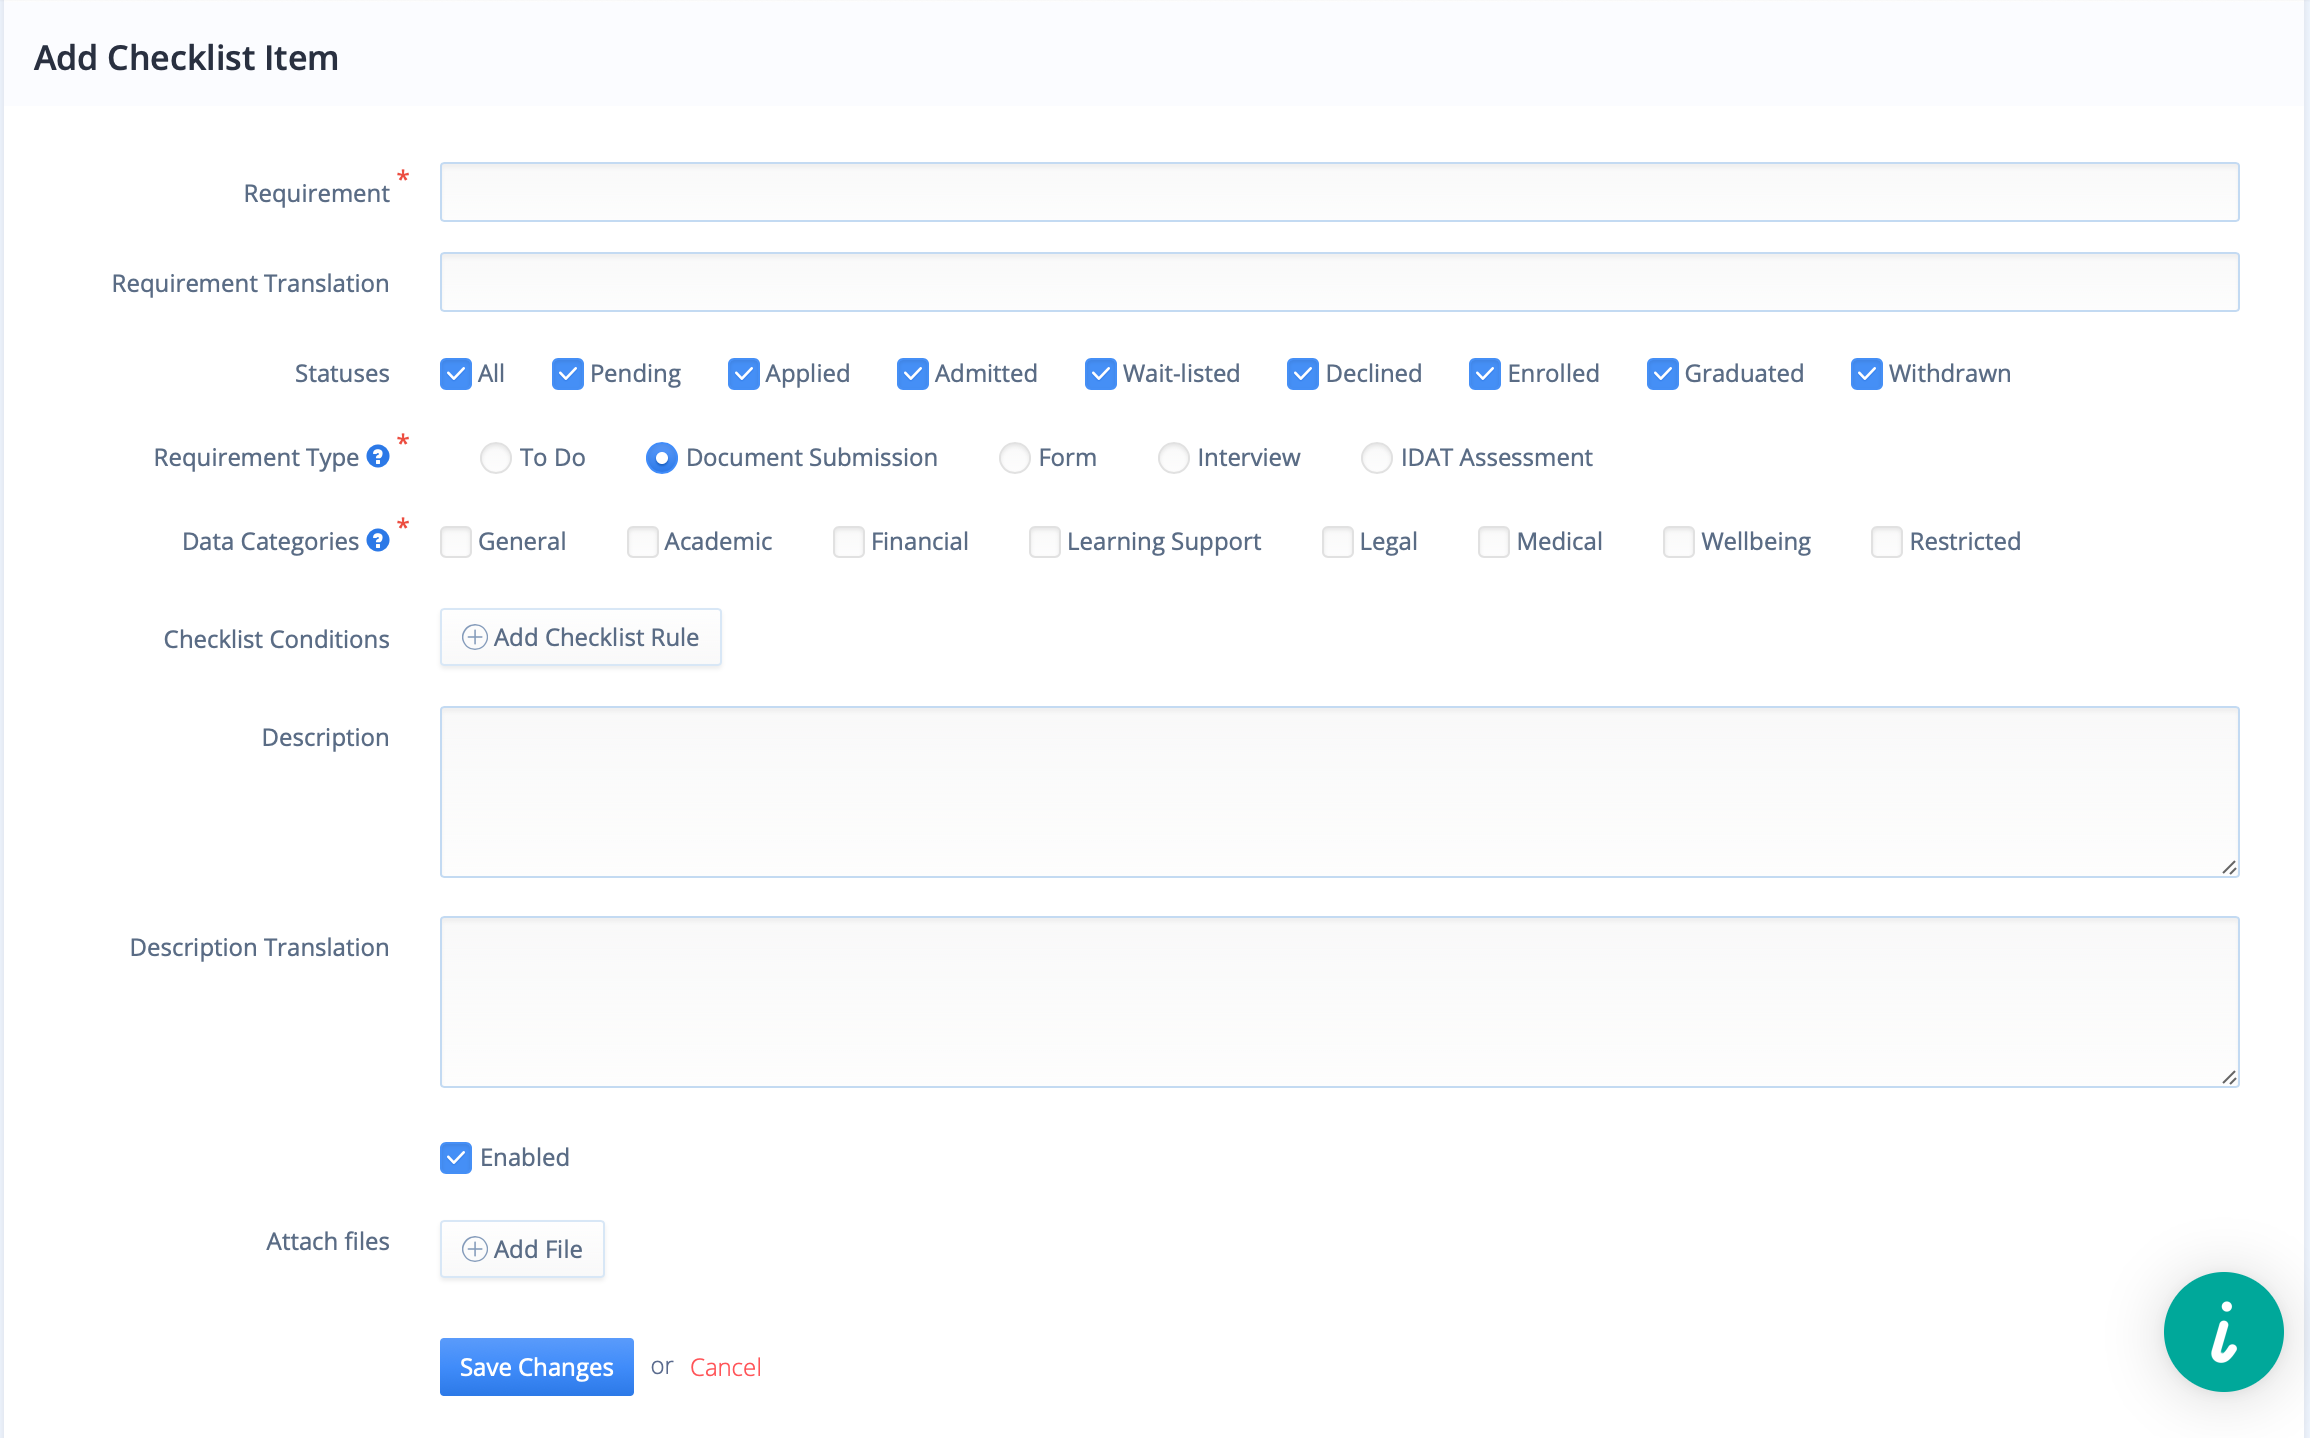
Click + Add Checklist Item
You can then name the checklist item Requirement, select which Statuses the item applies to, select Requirement Type, add a Description to provide further information about the requirement, and Add a File to be made available for download. When you have added the relevant information click Save Changes.
The following requirement types are available:
To Do - This appears as text for the parent, and can only be marked as complete by administrator. It is useful for sharing documents, links or other information with parents.
Document Submission - This is a file upload checklist item, which is automatically completed when the parent uploads a file, e.g. school reports or passport copies. Note, for Document Submission checklist items, it is necessary to choose the 'Data Categories' for that checklist item. Only users with permission to access those Data Categories will be able to view any documents uploaded to that checklist item.
Form - This checklist item links to a form, for example the application or enquiry form, or additional forms such as health or recommendation forms.
Interview - This is a requirement for an interview or assessment, which is scheduled by an administrator. The checklist item is marked as complete when the administrator schedules an interview and marks the corresponding interview as completed. Several interview checklist items can be added, if there are different stages of interview or assessment.
Open Day - This is a requirement for the applicant to attend an Open Day. This is automatically completed once the applicant is registered for an Open Day event. Only one Open Day checklist item can be added per checklist
Tour - This is a requirement for the applicant to attend a tour. This is automatically completed once the applicant is registered for a tour. Only one tour checklist item can be added per checklist
Editing an Existing Checklist Item
Navigate to Settings > Admissions > Checklist and select the desired Programme. Then click on the Edit icon to the right of the item you wish to change.
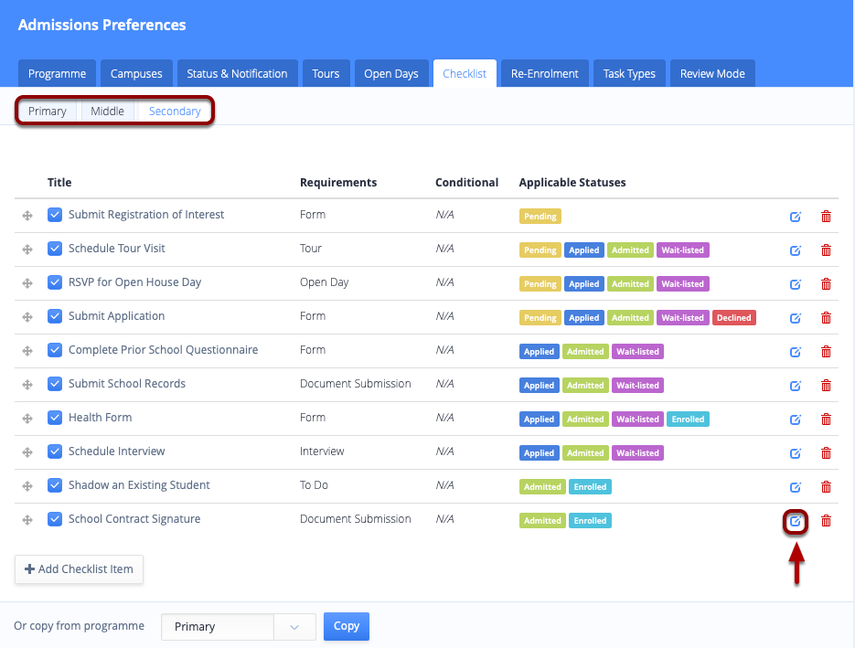
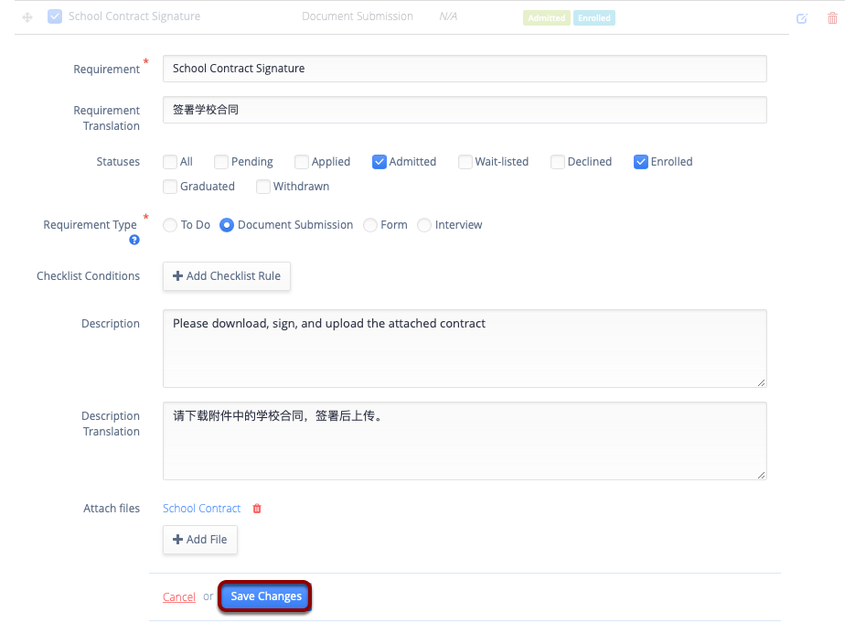
Make the desired changes and click Save Changes.
To remove a checklist item, click on the Delete icon to the right of the desired item. To disable a checklist item, untick the Checkbox to the left of the item. Drag and drop items by clicking on the Four Arrows icon to rearrange the order of your checklist.

Copying All Checklist Items to Another Programme
Navigate to Settings > Admissions > Checklist and select the Programme you would like to copy to. This Programme's checklist must be blank. Select the checklist you would like to copy from via the Or copy from programme dropdown. Then click Copy.
An exact copy of the other programme's checklist will be created.
